(505) 280-5216
Homeowners: 8 Immediate Steps to Diagnose a Burning Dryer Smell
A burning smell from your dryer can mean lint ignition, mechanical friction, or an electrical fault, and any of the three can lead to fire. Stop the dryer right now, unplug it or shut off the breaker, and shut off the gas valve if you have a gas dryer. The rest of this guide walks through what the smell tells you, how to check it safely, and when the job belongs to a professional.
TL;DR:
- A burning smell from your dryer often indicates lint buildup, mechanical friction, or electrical faults that require immediate attention to prevent fire hazards.
- Different odors point to specific issues: acrid smells suggest lint ignition, rubber odors indicate drive belt problems, and metallic or chemical scents signal electrical failures.
- Safety steps include disconnecting power, inspecting vent hoses and lint traps, and avoiding restarting the dryer until all causes are ruled out or professionally addressed.
- Persistent or worsening smells, visible smoke, or malfunctioning components mean professional repair or vent cleaning is necessary to avoid serious risks.
- Regular maintenance, such as cleaning lint filters monthly and scheduling professional vent cleaning annually, significantly reduces the risk of dryer fires caused by buildup.
Table of Contents
- What To Do the Moment You Smell Burning From Your Dryer
- What’s Causing the Smell? Matching Odor Type to the Problem
- How to Safely Inspect and Troubleshoot the Problem
- When to Stop Troubleshooting and Call a Professional
- Building a Maintenance Routine That Actually Prevents This
- What Professional Dryer Vent Cleaning Actually Involves
- The Real Lesson Behind a Burning Dryer Smell
- Sources
- FAQ
What To Do the Moment You Smell Burning From Your Dryer
Do not wait to finish the load. A burning smell from your dryer means something inside is overheating, and every extra minute of runtime adds risk.
Follow these steps in order:
- Stop the dryer immediately. Hit the power button or open the door; don’t let the cycle finish.
- Check for smoke, sparks, or flames. If you see any of these, evacuate the house and call 911 before doing anything else.
- Cut the power. Unplug the dryer or switch off its circuit breaker at the panel.
- Shut off the gas if applicable. Gas dryers need the gas valve closed, not just the power cut.
- Ventilate the room. Open a window or door near the dryer to clear any lingering odor or smoke.
- Remove the clothes once the drum has cooled, and set them aside for inspection since scorched fabric holds clues about what happened.
- Do not restart the dryer to “see if it happens again.” That test can cost you the appliance or worse.
- Leave the internal panels closed until the power is fully disconnected. Never open the back or front panel on a plugged-in machine.
Dryers rank among the more common sources of home appliance fires, and federal fire-prevention guidance consistently points to lint and vent blockages as the leading contributing factor. That single statistic is the reason every safety checklist starts with stopping the machine, not troubleshooting it.
Pro Tip: Keep a small flashlight near your laundry area. If you ever need to check a vent hose or the back of the dryer in a hurry, you don’t want to be doing it by phone light.
What’s Causing the Smell? Matching Odor Type to the Problem
Not every burning smell means the same thing, and the type of odor is one of the fastest ways to narrow down the cause before a technician ever shows up. Appliance-repair guides use this exact triage method, and it works because different failures produce distinctly different chemistry.
- Hot, dusty, or acrid smell: Almost always lint. CPSC testing on electric dryers found that lint accumulated near the heating element can smolder or ignite outright, and a blocked exhaust vent raises that risk further by changing how heat moves through the machine.
- Rubbery or burning-rubber smell: Usually a slipping or failing drive belt or idler pulley. Repair technicians note that a slipping belt generates friction heat exactly where rubber lives, and it typically needs a part swap, not a cleaning.
- Metallic or grinding odor, often paired with noise: Points to worn bearings or rollers. The drum is rubbing metal on metal somewhere it shouldn’t, and that combination of smell and sound rarely resolves on its own.
- Sharp chemical or metallic smell: The one to take most seriously. This usually signals an electrical issue such as a failing heating element, motor winding, or wiring fault, and appliance experts recommend stopping use immediately rather than running another load to “test it.”
- Plastic or chemical odor with no obvious source: Check for a foreign object like a pen, lighter, or plastic hanger piece that’s melted against the drum or heating element.
- Mild chemical smell only during the first few cycles of a brand-new dryer: Normal. Manufacturer guidance explains this comes from shipping oils and coatings burning off, and it should clear within one to three cycles.
Learning this smell-to-cause map does more than satisfy curiosity. It tells you whether you’re looking at a five-minute cleaning job or a repair call, which changes everything about your next move.
How to Safely Inspect and Troubleshoot the Problem
Once the dryer is off and cool, you can do a fair amount of safe diagnostic work yourself. The key word is safe: every step below assumes the power is disconnected and, for gas units, the gas valve is closed.
- Confirm power is off before touching anything. Unplug the cord from the wall rather than trusting the control panel is truly off. This isn’t optional. Opening a cabinet on a live appliance is how people get hurt.
- Clean the lint trap and its housing. Pull the lint screen and vacuum the slot it sits in, since lint packs down in that channel far more than most owners realize.
- Disconnect the vent hose from the back of the dryer and check it for crushed sections, lint buildup, or pet hair clogs. Then walk outside and check the exterior vent hood, holding your hand near it while a helper briefly runs the dryer on air-only mode to confirm airflow is strong and steady.
- Open the cabinet only with the power disconnected. Look for charred or matted lint, scorch marks on metal surfaces, melted plastic, or any object that doesn’t belong.
- Listen and feel for mechanical trouble. Spin the drum by hand. Grinding, squealing, or heavy resistance points to bearings, rollers, or a failing motor, and those parts typically require a technician rather than a home fix.
- Check the thermal fuse and thermostat with a multimeter if you’re comfortable with basic electrical testing. A thermal fuse that reads no continuity has likely tripped from overheating, which is often a symptom of a vent blockage rather than a standalone fault.
- Run a short, unloaded test cycle after cleaning to confirm the smell is gone and the drum turns smoothly before loading real laundry back in.
NFPA-based prevention data attributes a notable share of dryer fires directly to lint that was never cleaned out, which is exactly why steps two and three do most of the heavy lifting here. If airflow at the exterior vent is weak even after you’ve cleared the visible sections, the blockage is likely further down the duct, and that’s a job for professional dryer vent cleaning rather than a longer vacuum hose.
When to Stop Troubleshooting and Call a Professional
Some symptoms mean the diagnosis phase is over. Trying one more fix at this point isn’t resourceful, it’s risky.
- Any visible smoke, sparks, or flames, even brief ones. Evacuate and call 911 if you see active fire or heavy smoke.
- Scorch marks on clothing or inside the drum that you didn’t put there. That’s evidence of a heat event, not routine wear.
- A persistent electrical or metallic burning smell that returns after you’ve cleaned everything you can reach. This usually means the heating element, motor, or wiring needs a technician’s diagnosis.
- Repeated overheating cycles where the dryer shuts itself off or the thermal fuse trips again shortly after replacement.
- A motor that doesn’t spin freely by hand, or one that hums but won’t turn the drum.
- Airflow at the exterior vent that stays weak after a full homeowner cleaning. That points to a deeper obstruction such as a collapsed duct section, a long unsupported flexible run, or a bird’s nest, and it calls for a dedicated dryer vent cleaning specialist rather than a general appliance repair visit.
It helps to know the difference between the two calls you might need to make. An appliance repair technician handles the dryer itself: belts, motors, heating elements, thermostats, and wiring. A vent cleaning specialist handles the exhaust path from the back of the machine to the exterior hood, including sections of ductwork you can’t reach with a household vacuum. Some problems genuinely need both.
Building a Maintenance Routine That Actually Prevents This
Most burning smells trace back to maintenance that got skipped, not bad luck. A simple, consistent routine closes most of that gap.
- After every load: Clean the lint screen by hand, and check pockets before washing so items don’t end up melted against the drum later.
- Every three to six months: Disconnect and inspect the vent hose and exterior wall vent for buildup, kinks, or sagging sections, especially if you’re running long flexible duct runs.
- Annually, or sooner if drying times have crept up: Schedule a professional vent cleaning if you have a long duct run, heavy laundry volume, or a history of clogs. A rigid, short run needs this less often than a long flexible one snaking through an attic or crawlspace.
- Keep flexible foil duct runs as short as possible. Every extra foot and every bend adds a spot for lint to catch.
- Avoid overloading the drum. Overstuffed loads dry slower, run hotter for longer, and put more strain on the belt and motor.
- Replace worn belts, rollers, or pulleys proactively rather than waiting for a full failure, since a slipping belt rarely fixes itself.
Pro Tip: If your dryer takes noticeably longer to dry a load than it did six months ago, treat that as an early warning sign, not just an inconvenience. Slower drying almost always means restricted airflow, and restricted airflow is the same condition CPSC testing links to higher lint-ignition risk.
This routine echoes the same conclusion fire-prevention agencies keep repeating: regular lint and vent cleaning is one of the most reliable ways to cut dryer fire risk, and it costs a fraction of what a repair or a house fire costs.
What Professional Dryer Vent Cleaning Actually Involves
A homeowner cleaning can clear the lint trap and the first few feet of hose. A professional service is built to clear the whole run, and that distinction matters more than most people realize until their vent hose alone isn’t the problem.
A typical professional visit includes:
- Inspection of the exterior vent hood to confirm it isn’t blocked, crushed, or nested in by birds or rodents.
- Rotary brush cleaning through the entire duct run, working from the interior connection point out to the exterior hood, dislodging buildup that a shop vacuum can’t reach around bends.
- Negative-pressure vacuum extraction to capture dislodged lint rather than just pushing it further down the line.
- A before-and-after airflow check so you have a concrete measurement, not just a guess, that the vent is actually clear.
Royal Carpet and Tile Cleaning approaches dryer vent cleaning in Albuquerque and Rio Rancho with this full-run process rather than a quick surface pass, and it also offers eco-friendly disinfectant options for households dealing with pet odor or allergy concerns alongside the vent work itself.
| What to ask a vent cleaning company | Reasonable deliverable |
|---|---|
| Do you clean the full duct run or just the accessible section? | Full run, interior connection to exterior hood |
| Can you show before-and-after airflow? | Photos or a direct airflow demonstration |
| What’s the price range for a standard single-family home? | A quoted range before the visit, not just on arrival |
| Do you inspect the exterior vent hood? | Yes, as a standard part of the service |
When you’re ready to have the whole system checked rather than just the parts you can reach, Royal Carpet and Tile Cleaning’s dryer vent cleaning service covers the full run with rotary brushing and vacuum extraction, and the same visit can be paired with tile, grout, or upholstery cleaning if you’re already tackling a home maintenance list. Homeowners in Albuquerque and Rio Rancho can request a quote directly through the site, and the same local team also handles professional carpet cleaning if lint dust has settled into nearby flooring.
The Real Lesson Behind a Burning Dryer Smell
Most homeowners treat a burning smell as an annoyance to troubleshoot around, not a signal to stop. That instinct is backwards. The CPSC’s own lint-ignition testing shows the conditions for smoldering exist inside a completely normal, well-used dryer the moment airflow gets restricted. You don’t need a rare defect for this to become dangerous. You need ordinary neglect.
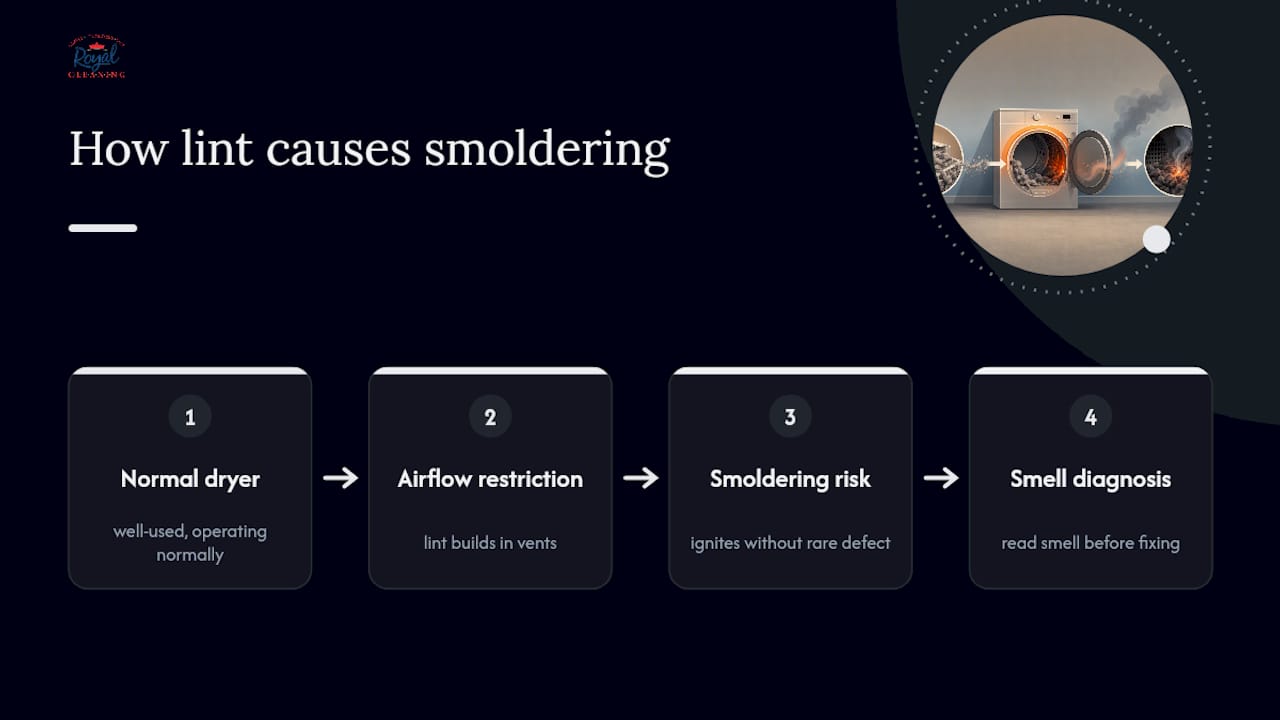
The conventional advice to “just clean the lint trap and see if it goes away” isn’t wrong, but it’s incomplete. It treats the lint screen as the whole system when it’s really just the entry point. The real fix lives in the duct run you can’t see, which is exactly why homeowner cleaning and professional vent cleaning solve different problems.
If there’s one thing to prioritize first, it’s this: use the smell itself as diagnostic information rather than something to mask. A hot, dusty smell after months of skipped vent checks is a very different situation from a sharp metallic smell on a machine you clean regularly. Read the smell before you reach for a fix.
— Bernadette
Sources
For readers who want the primary data behind this guide, the CPSC’s final report on electric dryer lint ignition documents the lab testing behind lint ignition risk. Manufacturer troubleshooting pages and independent repair guides like iFixit’s burning-smell diagnostics offer practical, model-agnostic steps for homeowners doing their own inspection.
- CPSC — Final Report on Electric Clothes Dryers and Lint Ignition Characteristics
- USFA / FEMA — Appliance and electrical fire prevention
- Sears Home Services — Dryer burning smell causes & solutions
- Asurion — Fix burning smell coming from dryer
- Samsung support — dryer smells or smokes
FAQ
Can I still use my dryer if it smells burnt?
No. Stop the dryer and unplug it as soon as you notice a burning smell, then diagnose the cause before running another load. Continuing to use it risks lint ignition or an electrical fault turning into an actual fire.
How do I get the burnt smell out of my dryer?
Clean the lint trap and housing thoroughly, then disconnect and clear the vent hose and exterior vent hood before running a short, empty test cycle. If the smell returns after a full cleaning, the cause is likely mechanical or electrical rather than lint, and it needs a technician.
Why does my dryer smell burnt and won’t spin?
A drum that won’t spin along with a burning smell usually points to a failed belt, a seized motor, or worn bearings rather than a simple lint clog. Unplug the dryer and have a technician inspect the drive system before attempting further use.
Why does my dryer still have a burning smell even after I clean the vent?
If cleaning the accessible vent section doesn’t resolve the smell, the blockage may be deeper in the duct run, or the cause may be mechanical or electrical rather than lint at all. A full-run professional vent cleaning or an appliance repair inspection can identify which one it is.