(505) 280-5216
Dryer Not Drying? Fix Airflow Fast and Avoid Fire Risk
Most dryers that run but don’t dry have restricted airflow rather than a broken heater. Check the lint trap and exterior vent first. If you smell burning or the cabinet feels unusually hot, stop the dryer, unplug it, and don’t run it again until you’ve confirmed strong, steady airflow at the exterior vent.
TL;DR:
- Most dryers that run but don’t dry clothes often have restricted airflow caused by lint buildup, not a broken heater.
- Testing the exterior vent for steady warm airflow and inspecting the transition hose reveals if the duct is clogged or kinked.
- Short, accessible duct runs can be safely cleaned DIY by disconnecting the hose, brushing inside, and vacuuming, but longer or concealed ducts require professional help.
- Use a 10-minute timed-dry cycle to check if the drum warms normally, indicating the issue resides downstream in the vent system.
- Regular maintenance includes cleaning the lint trap after every load and scheduling professional vent cleanings at least once annually to prevent fire hazards.
Table of Contents
- Quick Checklist for a Dryer Not Drying Well
- How Do You Test if Your Dryer Vent Is Clogged?
- Safe DIY Vent Cleaning: Step-by-Step Method
- When Should You Call a Professional Instead?
- How Often Should You Clean a Dryer Vent?
- What Does a Professional Dryer Vent Cleaning Visit Include?
- What I’d Actually Do First
- Get Your Dryer Vent Professionally Cleared
- Sources
- FAQ
Quick Checklist for a Dryer Not Drying Well
Before you pull the dryer away from the wall or call anyone, run through this checklist. It takes ten minutes and rules out the most common culprits.
- Clean the lint screen completely, then check for a sticky, waxy film on the mesh. If it feels slick rather than dry, scrub it monthly with hot water and dish soap. Dryer sheets leave residue that clogs the weave over time.
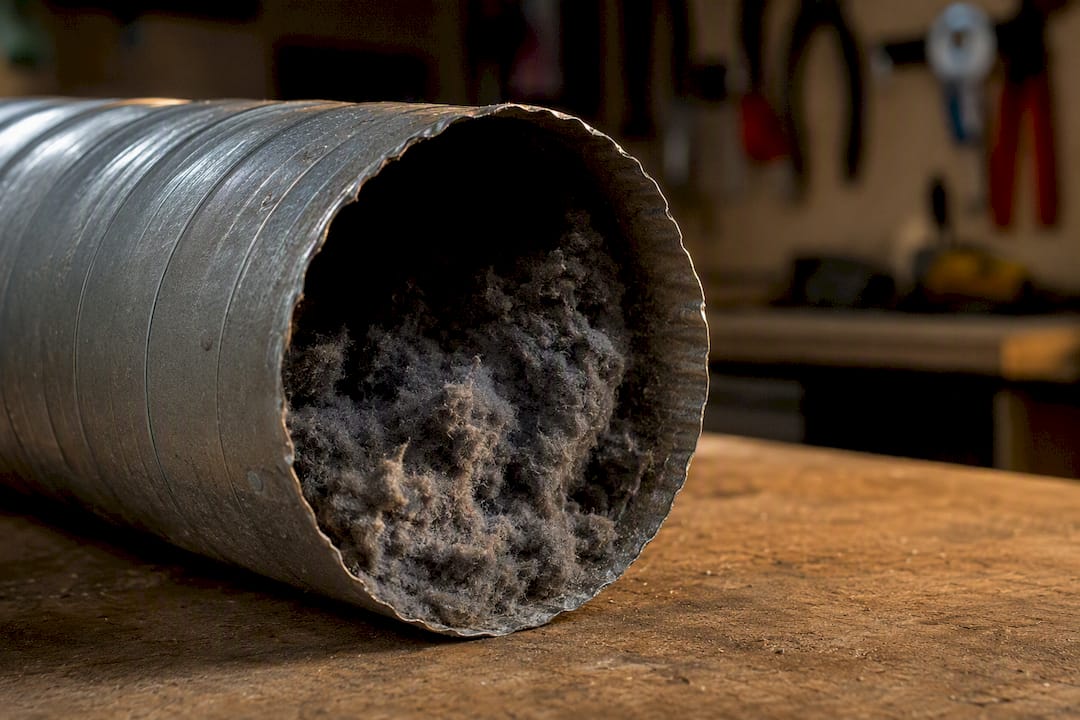
- Pull the dryer out and check the transition hose (the flexible section connecting the dryer to the wall) for kinks, crushing, or a buildup of lint at the connection point.
- Review your dryer settings. Energy Saver and Sensor Dry modes are efficient, but they can end a cycle early if the load is oversized or unevenly distributed.
- Separate the symptoms: a dryer that never gets hot points to an electrical or heating-element problem, while a dryer that heats fine but still leaves clothes damp almost always means restricted exhaust airflow.
- Watch for warning signs together: very little lint in the trap after a full load, a burning smell during operation, or an exterior vent flap that doesn’t open when the dryer runs.
If you’re seeing heat but no drying, move to the next step and test the actual airflow path.
How Do You Test if Your Dryer Vent Is Clogged?
Three simple tests separate a heating problem from an airflow problem, and you can run all of them in under fifteen minutes.
- Run a short timed-dry cycle. Start the dryer on a 10 minute timed-dry setting, then open the door after 30 to 60 seconds and feel inside the drum. If it’s warming up normally, the heating element and thermostat are probably fine, and the issue lives downstream in the duct.
- Check the exterior vent while the dryer runs. Go outside to the exhaust hood. The damper flap should swing open, and you should feel a strong, steady flow of warm air from about 12 to 18 inches away. A weak trickle or no movement at all is the clearest sign of a blocked or restricted vent.
- Inspect the transition hose and back connection. With the dryer unplugged and pulled from the wall, look inside the flexible hose and where it meets the wall duct. Packed lint here is one of the most common points of failure, especially on older accordion-style foil hoses.
- Note how much lint lands in the trap. If a full load produces almost no lint, that’s often a clue the duct trapped it further down the line rather than at the screen.
- Wipe the moisture sensor bars with a damp cloth. These small metal strips inside the drum detect moisture to end sensor-dry cycles. A film of fabric softener residue can make the sensor think clothes are dry when they aren’t.
Statistic to watch: normal dry times run about 45 to 60 minutes for a medium load. A sustained jump above that window, especially if it crept up gradually, is a reliable indicator of a blocked dryer vent rather than a random fluke. Manufacturer support pages, including Samsung’s own troubleshooting guide, start with these same checks before assuming a part has failed.
Safe DIY Vent Cleaning: Step-by-Step Method
If your duct run is short and reasonably straight, cleaning it yourself is realistic and safe when you follow the right order of operations.
- Cut the power first. Unplug the dryer, and if you have a gas dryer, shut off the gas supply valve behind it. Put on a dust mask and eye protection. Compacted lint kicks up a surprising amount of fine debris.
- Disconnect the transition hose. Loosen the clamps and pull the 4-inch hose free from both the dryer and the wall duct. Inspect the material. If it’s plastic or foil accordion hose, replace it with rigid or semi-rigid metal duct once you’re done. Metal handles heat better and doesn’t sag or trap lint in the ridges.
- Brush from the inside. Feed a flexible rod with a rotary brush attachment into the wall duct, working in short sections, pushing in about two feet, pulling back, then going deeper. Run a shop vacuum at the wall opening while you brush so dislodged lint gets captured instead of drifting into the room.
- Clean the exterior termination. Go outside and remove the vent cap. Brush back toward the house from the exterior opening to meet the lint you loosened from inside, then vacuum the cap and hood clear.
- Reconnect and test. Reattach the transition hose with new clamps, plug the dryer back in, and run a 5 to 10 minute heat cycle. Go outside and confirm the exterior flap opens with a strong, steady flow of warm air.
Pro Tip: Keep the transition hose as short and straight as the installation allows. Even a properly connected hose that’s too long or slightly kinked can restrict airflow enough to trip the dryer’s thermal fuse and shut down heat entirely.
DIY has real limits. Stop and call a professional if your duct run exceeds roughly 10 to 12 feet with multiple bends, if the vent exits through the roof, or if any section is concealed inside a wall or ceiling cavity. Pushing a brush rod too far can snap it inside the duct or pack lint deeper rather than pulling it free, which turns a simple cleaning job into a bigger repair. For a closer look at the full process and equipment involved, Royal Carpet and Tile Cleaning’s dryer vent guide walks through what a thorough job actually requires.
When Should You Call a Professional Instead?
Some situations aren’t worth handling yourself, no matter how capable you are with a drill and a shop vac.
- Stop immediately if you notice a burning smell, unusually hot air coming from the dryer cabinet, or any visible smoke. Unplug the unit and don’t run it again until it’s inspected.
- Call a pro for long or hidden duct runs, including anything routed through the attic, behind finished walls, or terminating on the roof, where a straight-line brush kit simply can’t reach every bend.
- Bring in a technician if DIY cleaning didn’t fix the drying time, since a persistent problem after cleaning often points to an in-wall blockage or a mechanical issue beyond the vent itself.
- Treat gas dryers with extra caution. A blocked vent on a gas unit risks backdrafting carbon monoxide into the home, and that diagnosis belongs to a qualified technician, not a weekend project.
Failure to clean dryer vents is a leading contributing factor in residential dryer fires, which is exactly why professionals lean on tools DIY kits don’t include. A rotary brush paired with a high-power HEPA vacuum and airflow testing clears compacted lint at elbows and confirms the fix actually worked, rather than just assuming it did.
How Often Should You Clean a Dryer Vent?
Prevention is cheaper and safer than repair, and it doesn’t take much time once it’s a habit.
- Clean the lint trap after every load. No exceptions, even on “quick dry” cycles.
- Deep-clean the trap screen monthly with hot water and dish soap if you use dryer sheets or fabric softener regularly, since residue builds on the mesh faster than most people expect.
- Schedule a full vent cleaning at least once a year, and shorten that to every six months if you have a large household, use the dryer daily, or own pets that shed heavily.
- Check the exterior termination quarterly. Bird nests, leaves, and debris collect at the hood faster than most homeowners realize, especially heading into fall.
- Audit your duct material and length periodically. Swap plastic or foil hose for rigid metal, and straighten or shorten the run wherever the installation allows it.
- Track your dryer’s normal cycle time against the manufacturer’s listed spec. A slow creep upward over a few months is often the earliest warning sign you’ll get.
What Does a Professional Dryer Vent Cleaning Visit Include?
A professional visit typically starts with an inspection of the full duct run, from the back of the dryer to the exterior termination, to map where lint has accumulated and identify any bends or connection points that need extra attention. From there, technicians use a rotary brush system paired with a high-power vacuum to clear the line, then run an airflow test to confirm the fix actually restored proper exhaust.
Royal Carpet and Tile Cleaning follows this same multi-step process for homeowners in Albuquerque and the surrounding area, using eco-friendly practices and transparent pricing so you know what a visit involves before it starts. Jobs with roof exits, in-wall sections, or any sign of prior overheating get flagged for extra care rather than treated as routine. For typical costs and what a visit looks like from start to finish, the dryer vent cleaning cost breakdown lays out ballpark ranges so there are no surprises.
What I’d Actually Do First
Run the quick checks, then test the exterior vent, then clean it yourself if the run is short and accessible. Call a professional if you hit a red flag or nothing improves. If you smell burning or the dryer feels dangerously hot, skip every other step and unplug it now. That’s the order that keeps you both dry and safe.
— Bernadette
Get Your Dryer Vent Professionally Cleared
Royal Carpet and Tile Cleaning gives Albuquerque and Rio Rancho homeowners a faster path to a fully cleared vent than a solo trip to the hardware store for a brush kit and a ladder. Where DIY tools stop at a straight, reachable duct, our technicians bring rotary brushes, HEPA vacuum systems, and airflow testing built to clear roof terminations, in-wall sections, and long runs with multiple bends safely.

A visit includes a full inspection, rotary-brush cleaning of the duct interior, HEPA vacuum extraction, and an airflow test at the exterior vent before we call the job done. If you’re dealing with a burning odor, a concealed or roof-mounted run, or a dryer that still won’t dry after you’ve tried the basics, that’s exactly the situation professional service is built for. Visit our cleaning services page to see current service areas and request a quote, or check scheduling availability for a dryer vent cleaning this week.
Sources
- FilterBuy: Signs and symptoms of clogged dryer vent
- Samsung support: Clothes are not dry after using Samsung dryer
FAQ
Why are my clothes still wet after a full dryer cycle?
Damp clothes after a full cycle almost always mean restricted airflow in the vent rather than a failed heating element, especially if the dryer still feels warm inside.
How do I know if my dryer vent is clogged?
Watch for a dry time creeping past the normal 45 to 60 minute range, weak airflow at the exterior vent, very little lint in the trap, or an exterior flap that barely opens.
Is it worth fixing a dryer that doesn’t heat?
Yes, in most cases. A no-heat problem usually traces to a specific part like a thermostat, heating element, or a tripped thermal fuse, and those repairs are typically far cheaper than replacing the whole unit.
How do I reset a dryer that won’t heat?
Check your breaker panel for a tripped breaker or blown thermal fuse first, since many dryers use a dual breaker circuit and one can trip while the other stays on, then unplug the dryer for a minute before restarting it.
How often should a dryer vent be professionally cleaned?
Regular professional cleaning once a year suits most households, while homes with heavy dryer use, pets, or long duct runs may benefit from more frequent cleanings.