(505) 280-5216
Homeowners: If Birds Nest in Your Dryer Vent, Wait 3 Weeks
If you suspect birds in your dryer vent, stop using the dryer right away and don’t touch an active nest. Chirping or scratching sounds mean live chicks, and disturbing them can be both unsafe and illegal. If the nest turns out to be abandoned, a straightforward removal, full vent cleaning, and a proper bird guard solve the problem for good.
TL;DR:
- Birds build nests in dryer vents quickly, often within one to two days during peak nesting season, making early prevention essential.
- Active nests are protected by law, and removal should only occur after confirmation that chicks have fledged, typically three weeks after eggs hatch.
- Signs of nesting include chirping, debris around the vent, slow drying times, and a musty smell, with visual clues like sticks and droppings confirming activity.
- DIY removal of abandoned nests requires proper PPE, inspection, and thorough cleaning, but active nests with chicks demand professional intervention to ensure legal compliance.
- Full vent cleaning and sanitization after nest removal are crucial to eliminate mites, bacteria, and odor, reducing fire risks and preventing recurring problems.
Table of Contents
- Signs You Have Birds Nesting in Your Dryer Vent
- Immediate Safety Steps If You Hear or See Birds in the Vent
- Legal Protections and Why Timing Matters
- Removing an Abandoned Nest Yourself, Safely
- When to Call a Wildlife Removal Specialist or Vent Cleaning Pro
- Why Full Vent Cleaning and Sanitization Matter After Removal
- Bird-Proofing Your Vent Without Blocking Airflow
- What Removal, Cleaning, and Repairs Typically Cost
- A Homeowner’s Perspective on Handling This the Right Way
- How Royal Carpet and Tile Cleaning Handles Nest Removal and Vent Cleaning
- Trusted Resources for Legal and Safety Questions
- Sources
- FAQ
Signs You Have Birds Nesting in Your Dryer Vent
Chirping and scratching sounds are the clearest giveaway, especially in the early morning when parent birds return to feed chicks. Rustling that stops the moment you approach the vent usually means an adult bird just ducked back inside. Nighttime silence with daytime activity is a strong pattern for songbirds, which build in spring and early summer.
Visual clues confirm what your ears pick up. Sticks, grass, or debris packed around the exterior vent cap, streaks of droppings below the opening, and birds flying in or out are all signs a nest is established, not just started. Common signs like chirping, visible debris, and slower drying times show up together more often than not, and they tend to get worse over a few days as nesting material accumulates.
Your dryer will usually tell you something is wrong before you ever look outside:
- Drying times that stretch well past normal, even on a standard load
- A dryer that trips its thermal cutoff and shuts off mid-cycle
- An exterior damper flap that won’t open, or barely moves, when the dryer runs
- A musty or “bird” smell coming from the laundry area
Do a ground-level check only. Walk to the exterior vent cap, look and listen from a safe distance, and skip the ladder. If the vent exits at roof height or near a second story, treat that as a job for someone else, not a weekend project.
Immediate Safety Steps If You Hear or See Birds in the Vent
Once you suspect a nest, your job is to remove risk, not remove birds. Nesting material packed against dryer lint is unusually flammable, and running the dryer against a blocked vent raises real fire danger. Nesting debris combined with lint creates a dense, combustible mass that a hot dryer exhaust can easily ignite.
Work through these steps in order:
- Turn off the dryer and unplug it. Don’t run another cycle, even “just to check.”
- If you have a gas dryer, don’t restart it, and shut off the gas supply if you can do so safely.
- Open a window or door near the laundry area for ventilation.
- Listen for 10 to 15 minutes. If you hear chirping or see movement, back away and leave the nest alone.
- If the vent is silent and you see no activity for a full day, move on to checking for abandonment.
Never poke, push, or spray anything into the vent to scare birds out. Pushing a nest deeper only compacts debris further into the ductwork, and repellents or open flame near a lint-filled vent are dangerous ideas that solve nothing.
Pro Tip: Keep a phone flashlight handy and check the exterior vent cap first, before the interior duct. Birds almost always build closer to the exterior opening, so you can often confirm activity without opening anything inside your laundry room.
Legal Protections and Why Timing Matters
Federal law protects most native birds the moment eggs or chicks are in the nest, and that protection determines your entire timeline. Under the Migratory Bird Treaty Act, disturbing an active nest with eggs or live chicks is generally prohibited, which rules out DIY removal for the vast majority of nesting situations you’ll encounter in spring.
The practical upside is that this wait is short. Young birds typically fledge, or leave the nest, in about three weeks. That’s the entire window you’re working with, not months.
A few points worth knowing before you decide what to do next:
- Non-native species like European starlings and house sparrows generally aren’t protected under the MBTA, which changes your options.
- Native songbirds, swallows, and most other wild species are protected while a nest is active.
- Species identification from a vent opening is genuinely hard to do accurately on your own.
- A wildlife control specialist can identify the species and, if protected status applies, coordinate any necessary permit before removal.
If you’re not sure what you’re dealing with, that uncertainty alone is a reason to call a professional rather than guess.
Removing an Abandoned Nest Yourself, Safely
Removal is only appropriate once you’ve confirmed the nest is truly abandoned, not just quiet for an hour. Watch the vent opening for a full day if possible: no chirping, no adult birds arriving with food, and no movement when you tap gently near the exterior cap are the signals you need before touching anything.
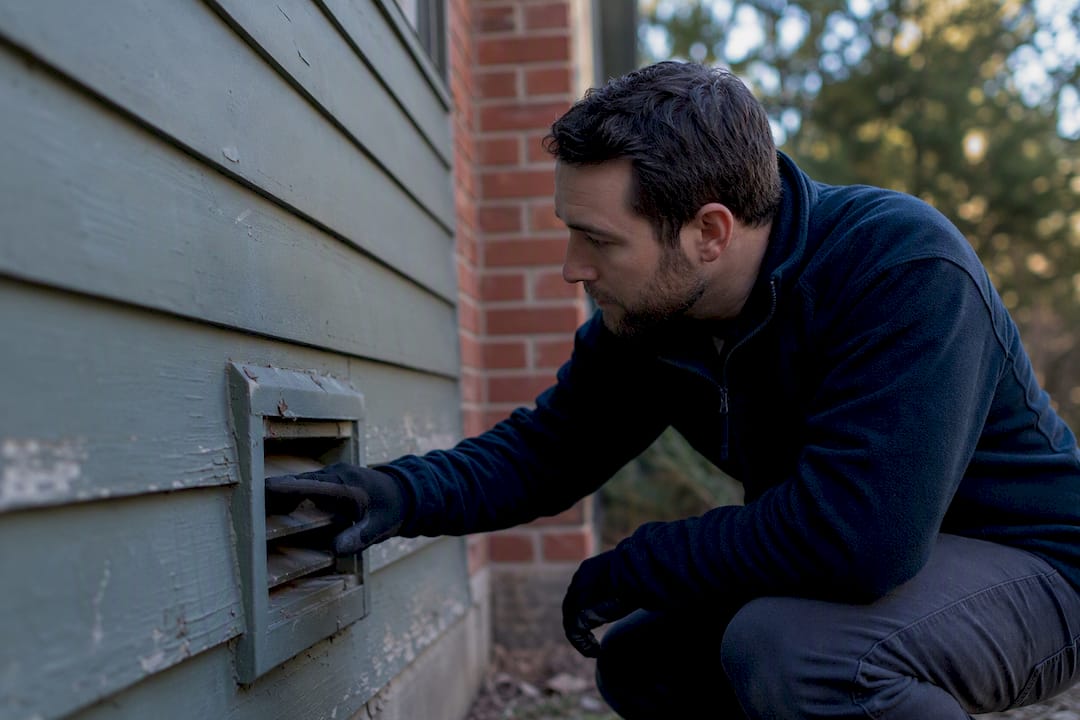
Gear up before you start. You’ll want work gloves, an N95 or dust mask, eye protection, a flashlight, a pair of long tongs or forceps, a screwdriver for the vent cap, and a shop vacuum with a hose attachment.
The removal sequence matters more than most homeowners expect:
- Unplug the dryer and confirm the gas supply is off if applicable.
- Remove the exterior vent cap with a screwdriver.
- Use tongs to pull out visible nest material by hand, working from the outside in.
- Vacuum loose debris and lint from the accessible duct section with the shop vacuum.
- Check the interior connection at the dryer and clear any material that’s been pushed toward that end.
- Wipe down the vent cap and surrounding surfaces, then reattach the cap securely.
Bird mites don’t leave when the nest does. DIY removal should be limited to abandoned nests, done with PPE, and followed by sanitization because mites and bacteria commonly remain in the ductwork even after the visible nest is gone.
Fast fact: most standard bird species build a fully functional nest in as little as one to two days during peak spring nesting, which is why prevention before nesting season starts is far more cost-effective than removal after the fact.
When to Call a Wildlife Removal Specialist or Vent Cleaning Pro
Some situations aren’t DIY territory, no matter how capable you feel with a screwdriver. Call a professional if the nest is active with audible chicks, you can’t confirm whether the species is protected, the vent runs through an attic or roofline you’d need a ladder to reach, or you notice signs of mites, heavy droppings buildup, or duct damage.
Two different specialists solve two different problems:
- Wildlife removal professionals handle humane extraction, accurate species identification, and any permitting required for protected birds.
- Dryer-vent cleaning professionals handle the mechanical side: rotating-brush cleaning, contamination removal, and duct repairs.
A complete professional service typically bundles nest removal, rotating-brush duct cleaning, damage inspection, and a pest-proof cover recommendation into one visit, which avoids the gap where a homeowner removes the nest but leaves the duct contaminated.
Before hiring anyone, ask a few direct questions: Are you licensed and insured for this work? Does the service include sanitization, or just physical removal? Is there a warranty on the cleaning or the vent guard installation? How soon can you schedule?
Pro Tip: If a company quotes you for “nest removal” without mentioning duct cleaning or sanitization, ask specifically what happens to the lint and debris left behind. That gap is where recurring odor and mite problems usually start.
Why Full Vent Cleaning and Sanitization Matter After Removal
Pulling the nest out is only half the job. Bird mites, bacterial residue from droppings, and lingering odor routinely survive nest removal, and sanitization addresses problems that DIY cleanup often misses entirely. That gap is exactly where a professional, multi-step process earns its cost.
A thorough post-removal workflow generally runs through these stages:
- Full visual inspection of the vent run, from the dryer connection to the exterior cap
- Mechanical removal of remaining nest fragments and compacted lint
- Rotating-brush vacuuming to clear the entire duct length, not just the visible ends
- Sanitizing fog or wipe-down treatment to address mites, bacteria, and odor
- A final inspection to confirm the vent is clear and functioning correctly
- Repair or replacement of any damaged sections, warped dampers, or loose connections found along the way
At Royal Carpet and Tile Cleaning, our dryer vent cleaning process follows this same logic: inspect first, clean thoroughly, sanitize with eco-friendly disinfectants, and price transparently before any work begins.
Leaving lint or nest fragments behind doesn’t just risk odor. It sets up the exact conditions, contamination plus airflow blockage, that let mite populations and fire risk both creep back within a season.
Bird-Proofing Your Vent Without Blocking Airflow
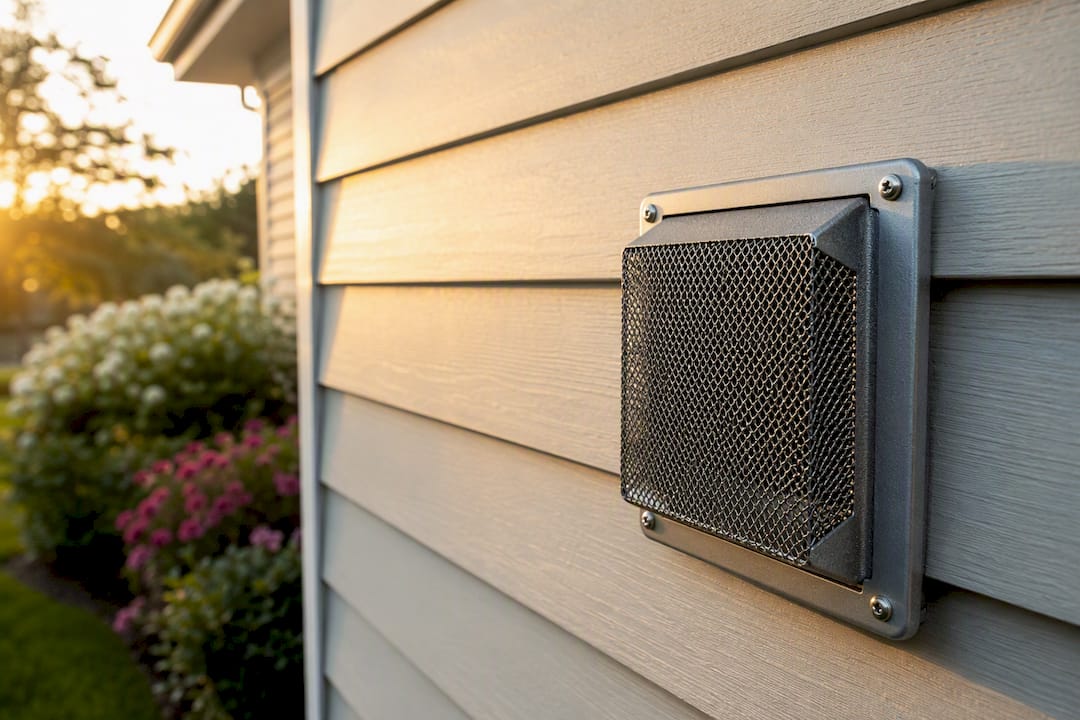
Not every vent guard actually protects your vent. Some designs trap lint instead of blocking birds, which trades one fire risk for another. Heavy-gauge metal guards with a mesh or recessed-damper design generally outperform lightweight screens, because they keep the damper free to open under suction while still stopping birds from entering.
Here’s what separates a guard that works from one that becomes a problem:
- Mesh or cage-style guards with wide enough openings for full airflow, not tight screens that catch lint
- Recessed or spring-loaded dampers that still swing open completely when the dryer runs
- Heavy-gauge metal construction rather than plastic, which degrades faster outdoors
- A design that can’t double as a bird perch right at the vent opening
Guards should let the damper open freely while blocking access; poorly designed covers that restrict airflow or collect lint can become new fire hazards over time rather than solving the original one.
Timing your installation matters as much as the guard itself. Put a new guard on before nesting season starts each year, and inspect covers at least twice annually, once before spring and once mid-year, to make sure lint hasn’t built up behind the mesh.
Pro Tip: Pair your guard installation with the preventive maintenance schedule many HVAC professionals recommend for the rest of your home’s ventilation system. Vents don’t fail in isolation, and a whole-house check catches problems a single vent inspection would miss.
What Removal, Cleaning, and Repairs Typically Cost
DIY removal costs you little beyond a mask, gloves, and maybe a new vent cap, generally under $30 in materials. Professional service costs more but covers ground DIY can’t.
- Standard professional nest removal plus full vent cleaning: commonly $150 to $350 for straightforward, ground-accessible cases
- Complex jobs involving attic access, extensive duct repairs, or heavy sanitization: priced higher than standard cases
- Full-service pricing details for dryer vent work vary by home layout and vent length
Timing is just as predictable. Safety steps happen the same day you notice a problem. A professional appointment typically lands within one to seven days of calling. If the nest is active and protected, expect to wait out the roughly three-week fledging period before any removal happens at all.
Roof access, protected-species handling, and deep ductwork repairs are the three factors most likely to push a quote toward the higher end.
A Homeowner’s Perspective on Handling This the Right Way
Most calls we get about this follow the same pattern: a homeowner notices the dryer running hot and slow, checks outside, and finds a nest jammed against the vent cap. The instinct is almost always to grab a broom handle and poke at it. That instinct is exactly backward.
The cases that go smoothly are the ones where someone stops the dryer first and asks questions second. A full inspection, eco-friendly sanitizing treatment, and transparent pricing before any work starts turn a stressful discovery into a routine fix.
Here’s the checklist worth keeping by the laundry room:
- Stop the dryer and unplug it.
- Listen for chicks before touching anything.
- If silent for a full day, gear up and check for abandonment.
- If active, call a wildlife professional.
- After removal, get the duct fully cleaned and sanitized.
- Install a metal guard before next nesting season.
— Bernadette
How Royal Carpet and Tile Cleaning Handles Nest Removal and Vent Cleaning
Royal Carpet and Tile Cleaning gives Albuquerque and Rio Rancho homeowners one call instead of two: humane, legally compliant nest handling paired with the full duct cleaning that stops the problem from coming back. Where a wildlife-only service leaves your vent contaminated and a duct-only cleaner won’t touch an active nest, our process covers inspection, removal, sanitization, and guard installation in a single visit.

Every visit starts with an inspection to confirm what you’re dealing with, followed by nest removal handled in line with federal wildlife protections when a nest is active. From there, we run a full rotating-brush duct cleaning, apply eco-friendly disinfectant to address mites, bacteria, and odor, and inspect the vent cap and damper for damage before installing a properly sized bird guard. Pricing is quoted upfront, before any work begins, so there’s no surprise at the end of the appointment.
If your dryer has been running slow or you’ve spotted debris at the vent cap, request an inspection through our dryer vent cleaning services page and we’ll get you scheduled.
Trusted Resources for Legal and Safety Questions
- U.S. Fish and Wildlife Service — Bird Nests: official guidance on federal nest protections
- BobVila — Birds in Dryer Vent: fire-risk and removal background
- Fire Hazard Examples in Homes: 2026 Safety Guide: broader home fire-safety context
Sources
- U.S. Fish and Wildlife Service — Bird Nests
- BobVila — Birds in dryer vent
- AirCentralUSA — Bird Nests in Dryer Vents: Removal & Prevention Guide
FAQ
Can a bird’s nest in a dryer vent cause a fire?
Yes. Nesting material combined with dryer lint creates a dense, highly flammable mass, and running the dryer against a blocked vent significantly raises fire risk.
What smell do birds hate the most?
Birds generally avoid strong scents like peppermint or vinegar, but scent-based repellents aren’t a reliable long-term fix and shouldn’t be sprayed directly into an active nest or vent.
What should I do if there are birds in my dryer vent?
Stop using the dryer immediately, unplug it, and check whether the nest is active. If you hear chirping or see eggs or chicks, leave it alone and call a wildlife removal professional.
How do I get birds to leave the vent?
If the nest is active, the safest and often legally required approach is to wait roughly three weeks for the young birds to fledge naturally, then remove the abandoned nest and install a guard. Trying to force birds out early risks harming chicks and may violate federal protections.
Is it legal to remove a bird’s nest from a dryer vent myself?
DIY removal is only appropriate for confirmed abandoned nests; active nests with eggs or chicks are generally protected under the Migratory Bird Treaty Act, and Royal Carpet and Tile Cleaning always recommends confirming abandonment before touching a nest.