(505) 280-5216
Homeowners: 48–72 Hour Rule for Sealing Shower Grout or Hiring a Pro
Yes, seal your shower grout if it is cement-based, since cement grout is porous and absorbs water, soap, and body oils that lead to staining and mildew. A penetrating sealer is the right choice for wet, enclosed spaces like showers. The short path: clean the grout thoroughly, let it dry completely, then apply a penetrating sealer according to the product label.
TL;DR:
- Test dry grout with water: darkening within 30 to 60 seconds signals absorption, while instant, widespread seepage warrants checking for deeper moisture problems before sealing.
- Follow the grout label: new cement grout usually needs 48 to 72 hours to cure, and a damp shower may need 24 to 72 hours to dry.
- Epoxy and urethane grout do not need sealer; applying it can leave a visible film, while film forming products can trap moisture beneath the surface.
- Sealer slows staining but cannot repair leaks or failed waterproofing; persistent dampness, damaged caulk, or crumbling grout needs investigation before application.
- Reseal when water darkens cured grout; checks every 6 to 24 months are a guide, and neutral tile cleaners help the sealer last.
Table of Contents
- Decide Whether You Need to Seal Your Grout
- When to Seal and How to Prepare Your Shower
- How to Seal Shower Grout, Step by Step
- Choosing the Right Sealer for a Shower
- Verify the Seal and Keep It Working
- Common Sealing Mistakes and How to Fix Them
- A Professional’s View on Grout Sealing in Showers
- What Actually Matters When Sealing Shower Grout
- Professional Grout Sealing from Royal Carpet and Tile Cleaning
- FAQ
- Sources
Decide Whether You Need to Seal Your Grout
Grout type determines whether sealing matters. Standard cement grout, sanded or unsanded, is porous and benefits from a penetrating sealer that slows water and oil absorption. High-performance cement grouts with polymer additives are less porous but often still improve with sealing. Epoxy and urethane grouts are different: they are already nonporous and do not need sealing at all, and applying sealer to them is one of the most common DIY mistakes.
A quick water drop test tells you where you stand. Place a few drops of water on dry grout and watch what happens for a minute or two.
- Water beads up and sits on the surface: the grout is still sealed and protected.
- Water darkens the grout within 30 to 60 seconds: it is absorbing moisture and needs sealing or resealing.
- Water seeps in almost instantly over a wide area: check for deeper problems before sealing.
Some issues sealing cannot fix: active leaks behind the wall, crumbling or missing caulk at corners and the tub-tile joint, or a saturated mortar bed that stays damp for days. Those point to a waterproofing failure rather than a sealing gap, and sealing over them just delays a repair that needs attention anyway.
When to Seal and How to Prepare Your Shower
Timing matters more than most DIY guides admit. New cement grout generally needs 48 to 72 hours of cure time before you apply sealer, according to manufacturer technical data, though some rapid-set formulas claim compatibility in as little as two hours. Always check your specific grout’s label rather than assuming.
- Confirm cure time has passed since the grout was installed, using the longer window if you are unsure which product was used.
- Clean thoroughly to remove soap scum, mineral deposits, and any mold or mildew using a non-acidic grout cleaner, following a sequence like this one for stubborn buildup.
- Rinse completely and run the bathroom fan or open a window.
- Let the shower dry fully, typically 24 to 72 hours depending on ventilation and how enclosed the space is, per which doors are best for bathrooms that affect humidity control.
- Mask tub edges, fixtures, and any epoxy-grouted sections you want to skip.
Grout that looks dry on the surface can still hold moisture deeper in the joint, especially on mortar-bed floors, so err on the side of waiting longer rather than sealing early.
How to Seal Shower Grout, Step by Step
Tools and protection: a narrow foam or felt-tip applicator (better than a brush for keeping sealer on the grout lines), microfiber cloths, nitrile gloves, painter’s tape for masking, and active ventilation (fan on, door cracked, or window open). Read the product label for any respirator recommendation, especially with solvent-based sealers.
- Confirm the grout is fully clean and dry using the water drop test before you start.
- Run a test patch in a small, low-visibility area to check color change and absorption time.
- Apply sealer to the grout lines only, working in small sections.
- Let it dwell for the time stated on the label, typically 3 to 10 minutes per sealing instructions.
- Wipe excess sealer off the tile face within the product’s wipe window, usually within 5 to 10 minutes of the dwell ending, per grout sealing guidance.
- Apply a second coat only if the label calls for one, after the first coat has set.
- Avoid water contact for the full cure period stated on the label before using the shower normally.
Pro Tip: Work from the top of the walls down and do the floor last, so drips land on surfaces you have not finished yet.
Pay extra attention to corner niches, built-in benches, and the area around the drain: these spots trap excess sealer easily and are the most common places haze shows up later. If sealer sits too long before wiping, it cures into a cloudy film that is far harder to remove than fresh residue.
Choosing the Right Sealer for a Shower
Not all grout sealers behave the same way in a wet, enclosed space, and the chemistry matters more here than in a kitchen backslash.
- Penetrating sealers (silanes, siloxanes, fluoropolymers) soak into the pore structure and stay vapor permeable, which is why they hold up better in showers.
- Film-forming sealers sit on top of the grout and can trap moisture underneath, making them more prone to peeling, clouding, or failing in constant humidity, according to grout porosity research.
- Water-based formulas tend to have less odor and are easier to work with in a small bathroom, while solvent-based formulas often penetrate denser grout better but need stronger ventilation.
- Before buying, check the label or technical data sheet for vapor permeability, recommended substrates, and the exact dwell and wipe times, since these vary by brand.
For shower use specifically, a penetrating sealer is nearly always the better match because the environment stays damp far longer than a kitchen floor or counter.
Verify the Seal and Keep It Working
Once the sealer has fully cured, per the label’s cure window, run the water drop test again across several spots, including low wall courses and floor grout near the drain.
- Water that beads cleanly means that area is sealed; water that darkens the grout means it needs another coat.
- A typical reseal interval runs anywhere from 6 to 24 months depending on shower use and cleaning habits, so tracking your last seal date makes the next check easier.
- Avoid bleach-heavy or highly acidic cleaners, which break down sealer faster than neutral pH cleaners made for tile and grout.
- A simple water bead test routine after regular cleaning is the easiest way to catch wear before stains set in.
Common Sealing Mistakes and How to Fix Them
Most sealing problems trace back to timing or product mismatch rather than a bad sealer.
- Haze or sticky film: usually means sealer sat too long before wiping. Buff immediately with a dry microfiber cloth if it is fresh; cured haze needs a sealer-compatible remover.
- Uneven darkening after sealing: often signals moisture trapped at depth, not a sealing failure. Sealing again will not resolve it; the mortar bed or membrane needs a look.
- Sealed epoxy or urethane grout by mistake: test with a water drop; if sealer sits as a visible film rather than absorbing, it likely needs to be stripped with a product made for that purpose before the grout can breathe normally again.
A Professional’s View on Grout Sealing in Showers
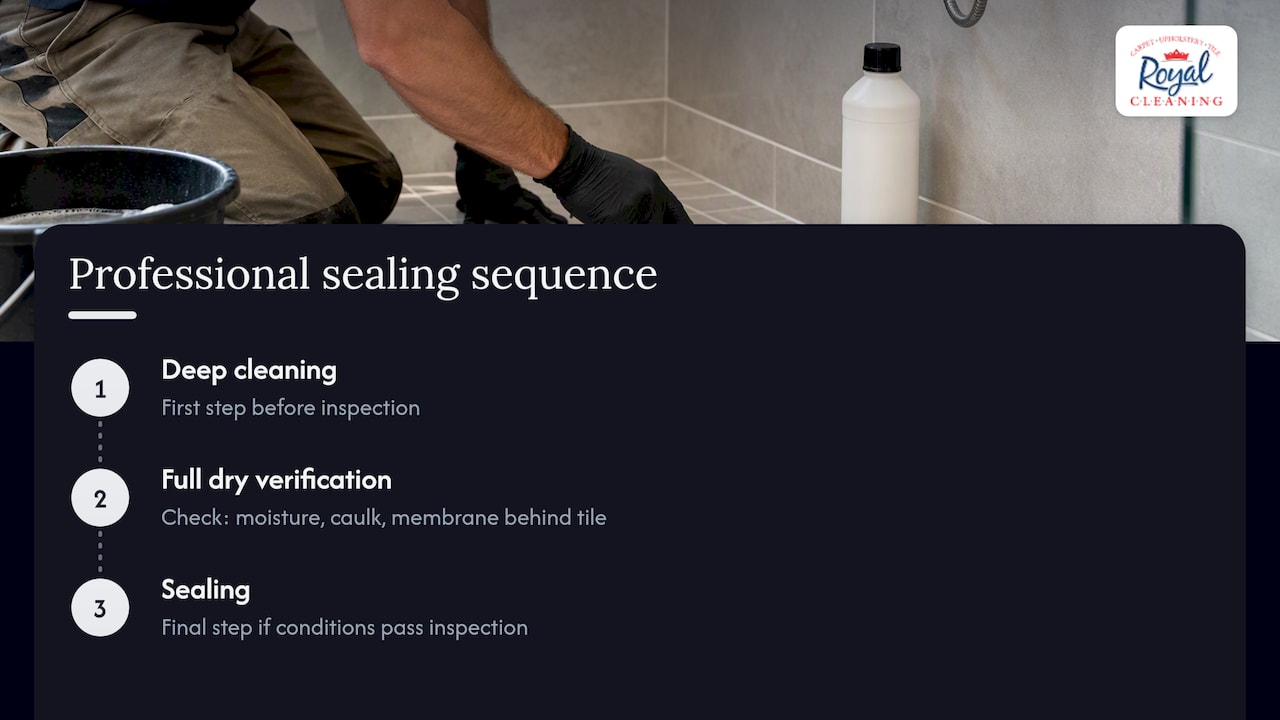
Our crews treat grout sealing as the last step in a multi-step clean: deep cleaning, full dry verification, then sealing. The checks homeowners most often skip are moisture at the lowest wall courses, caulk condition at seams, and early signs of membrane trouble behind the tile, the details that decide whether sealing alone will hold.
What Actually Matters When Sealing Shower Grout
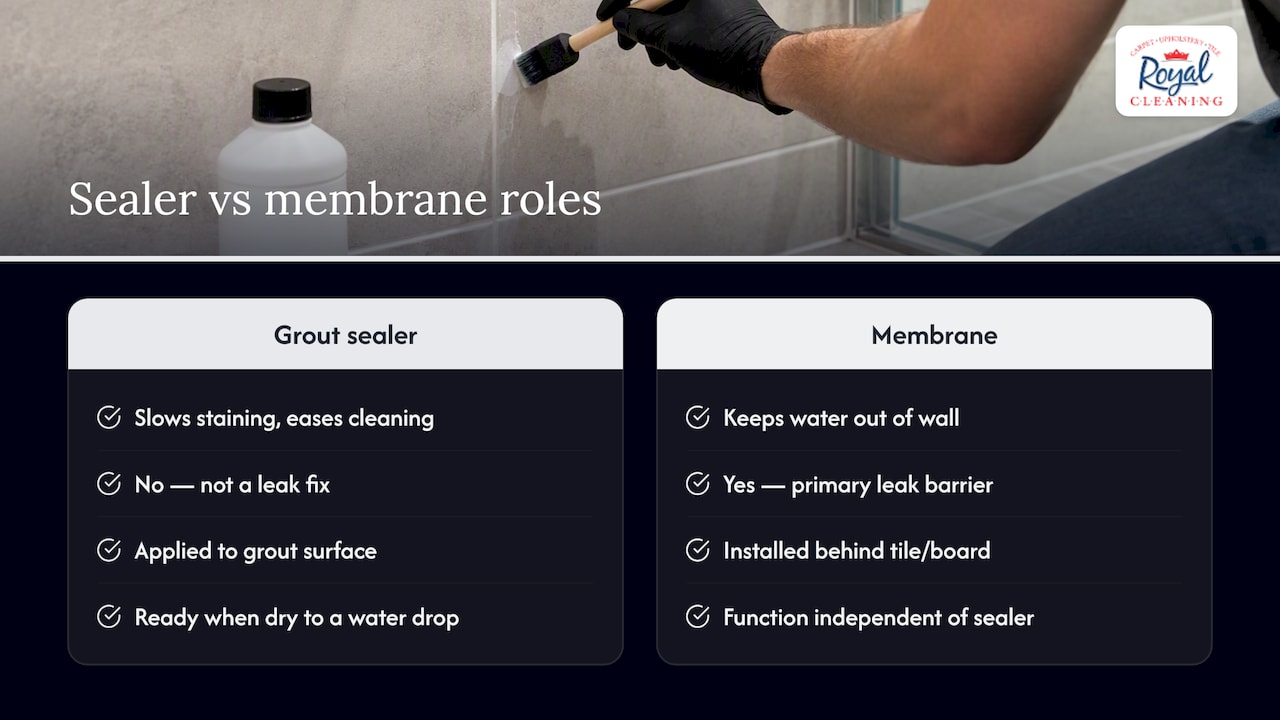
The biggest misconception we see is treating grout sealer as a leak fix. It is not, and no amount of careful application changes that. Sealer slows staining and makes cleaning easier; the membrane behind the tile is what keeps water out of the wall.
Where generic advice falls short is timing. Guides that tell you to seal “a few days” after grouting ignore how differently a mortar-bed shower dries compared to a backer-board tub surround. The lowest courses and the floor near the drain hold moisture the longest, and sealing them too early is why so many DIY jobs end up blotchy within weeks.
If you take one thing from this, prioritize the water drop test over the calendar. A grout joint that still darkens under a drop of water is not ready, no matter how many days have passed since grouting or cleaning. Patience at this stage saves you from redoing the whole job.
— Bernadette
Professional Grout Sealing from Royal Carpet and Tile Cleaning

When a shower involves a large mortar-bed floor, grout that stays damp longer than expected, or no second bathroom to fall back on while things dry, hiring a pro usually makes more sense than losing a week of shower access to trial and error. We handle the sequence ourselves: a deep clean to strip old residue and mildew, a dry verification check before any sealer goes on, careful sealing of the grout lines, and a water drop test to confirm the seal held.
- We check moisture at the lowest wall courses and around the drain before sealing, not just the surface.
- We provide transparent pricing before the job starts.
- We stand behind our grout color sealing work.
If your shower grout needs a professional eye, book our tile and grout cleaning and sealing service and we will handle the clean, dry, and seal process from start to finish.
FAQ
Is it a good idea to seal grout in the shower?
Yes, for cement-based grout. Sealing slows water, soap, and oil absorption, which reduces staining and mildew growth and makes routine cleaning easier, though it is not a substitute for a working waterproof membrane.
Can I put grout sealer on old grout?
Yes, as long as the grout is thoroughly cleaned and fully dry first. Old grout often needs a deeper clean than new grout since it has had time to absorb soap scum and mineral buildup that would otherwise get sealed in.
How often should you seal your grout in your shower?
A common range is every 6 to 24 months, depending on how often the shower is used and how it’s cleaned. The water drop test is the simplest way to check whether a specific spot needs resealing sooner.
What are the disadvantages of sealing grout?
Sealing adds a maintenance task, since most sealers wear down and need reapplication over time. Applying it to the wrong grout type, like epoxy, or wiping it too late can leave a hazy film that takes extra work to remove, and sealing can give a false sense of protection against leaks it was never designed to stop.
Sources
- Custom Building Products TDS (Aqua Mix® Grout Sealer / related technical data)
- Grout & Silicone – All you need to know about grout sealing
- Grout Atlas — Does grout waterproof tile?