(505) 280-5216
Restore and Seal Saltillo Floors for DIYers with a 5 Minute Water Test
Yes, Saltillo must be sealed. Unsealed Saltillo soaks up stains like a sponge, so leaving it bare invites permanent damage from water, oil, and grout. Choose a penetrating sealer for a natural, matte look, or a film-forming sealer for a glossy, classic finish that’s easier to wipe clean. If your current sealer is failing, strip it before resealing; if you’re not sure, a simple water test tells you where you stand.
TL;DR:
- A penetrating sealer is ideal for Saltillo if you want a natural matte look and minimal maintenance, while film-forming sealers provide a glossy finish with higher upkeep.
- Always test for porosity with water before sealing and wait at least 48 hours after installation to allow proper curing, especially before applying grout or sealer.
- Remove old sealer thoroughly with a compatible stripper and mechanical abrasion when signs of failure like peeling, haze, or uneven gloss appear.
- Reapply penetrating sealers as soon as water absorption is detected in a water test; full stripping is rarely necessary unless the sealer has visibly failed.
- For extensive staining or uncertain sealer history, professional deep cleaning and restoration are recommended over DIY methods.
Table of Contents
- Sealer types explained: penetrating vs film-forming
- When to seal: new installs, pre-grout strategy, and cure timelines
- Preparation and cleaning before sealing
- Stripping old or failed sealer: identification and safe removal
- Sealing workflow: materials, application, and final checks
- Troubleshooting and maintenance: stains, efflorescence, and recoat timing
- When to hire a professional for Saltillo restoration
- Getting Saltillo sealing right the first time
- Book professional tile cleaning and grout sealing in Albuquerque
- FAQ
- Sources
- Key sources for Saltillo tile sealing
Sealer types explained: penetrating vs film-forming
The choice between sealer types shapes how your floor looks and how much upkeep it demands for years to come.
Penetrating sealers, sometimes called impregnators, soak into the clay body and protect from within rather than sitting on top. They preserve the tile’s natural, matte texture without changing how the surface feels underfoot, which makes them a common choice for homeowners who want Saltillo to look like Saltillo. Because they don’t build a surface film, they rarely peel, and reapplication is usually just another coat rather than a full strip.
Film-forming, or topical, sealers work differently. They lay down a surface coating that can be buffed to a satin or gloss sheen, which is the look many people associate with classic Mexican tile floors. That shine comes with trade-offs:
- Film systems need more frequent maintenance since the coating wears first, not the tile.
- A gloss finish can get slippery when wet, which matters in kitchens, bathrooms, and entryways.
- Topical coatings generally hold up better indoors than outdoors, where UV and moisture cycle faster.
- Reapplying usually means a full or partial strip rather than a quick recoat.
For patios and exterior walkways, a breathable penetrating product tends to perform more predictably over seasons of freeze, heat, and rain. For interior living spaces where a warm, traditional sheen matters more than low maintenance, a film-forming system earns its upkeep.
When to seal: new installs, pre-grout strategy, and cure timelines
Timing determines whether your sealing job prevents problems or creates them. Manufacturer guidance recommends curing new tile and mortar for at least 48 hours before sealing, though temperature and humidity can push that window longer.
Sealing before grouting, often called a pre-grout seal, protects raw clay from absorbing grout haze and pigment, a common cause of permanent discoloration on unsealed Saltillo; for detailed advice, see our flooring blog with practical installation and maintenance tips. The risk runs the other way too: seal too heavily before grouting and you can interfere with grout adhesion in the joints. For most residential jobs, a light pre-grout coat followed by careful grout cleanup strikes the right balance:
- Use a pre-grout sealer formulated for that purpose, not a full topcoat product.
- Follow the dwell and wipe times on the datasheet rather than guessing.
- Run the water test on a few tiles before grouting to confirm porosity is under control.
Preparation and cleaning before sealing
Sealer failure almost always traces back to skipped prep, not a bad product. Before you open a can of sealer, work through this sequence.
- Run the water test. Place a few drops of water on the tile in several spots around the room and wait about five minutes. If the tile darkens or the water disappears quickly, it’s still absorbent and needs sealing.
- Sweep or vacuum thoroughly. Grit left behind scratches both the tile and your applicator pad.
- Clean with a pH-neutral cleaner. Avoid anything acidic or alkaline at this stage, since it can etch clay or leave residue that blocks sealer absorption.
- Spot-treat oil or grease. Pretreat stained areas separately before the general cleaning pass.
- Rinse completely and let the floor dry. Residual cleaner or moisture trapped under a sealer coat is a leading cause of hazing.
For organic growth like mildew, a dilute bleach or TSP solution can help, but use it sparingly. Preservation guidance warns that aggressive or repeated chemical cleaning can damage tile over time, so limit contact time, rinse thoroughly, and ventilate the room while you work. Wear gloves and eye protection whenever you’re handling bleach or TSP.
Pro Tip: If you’re dealing with old adhesive residue, deep oil stains, or you genuinely don’t know what sealer was used last, it’s worth having a professional tile and grout cleaning assess the floor before you commit to a DIY strip.
Stripping old or failed sealer: identification and safe removal
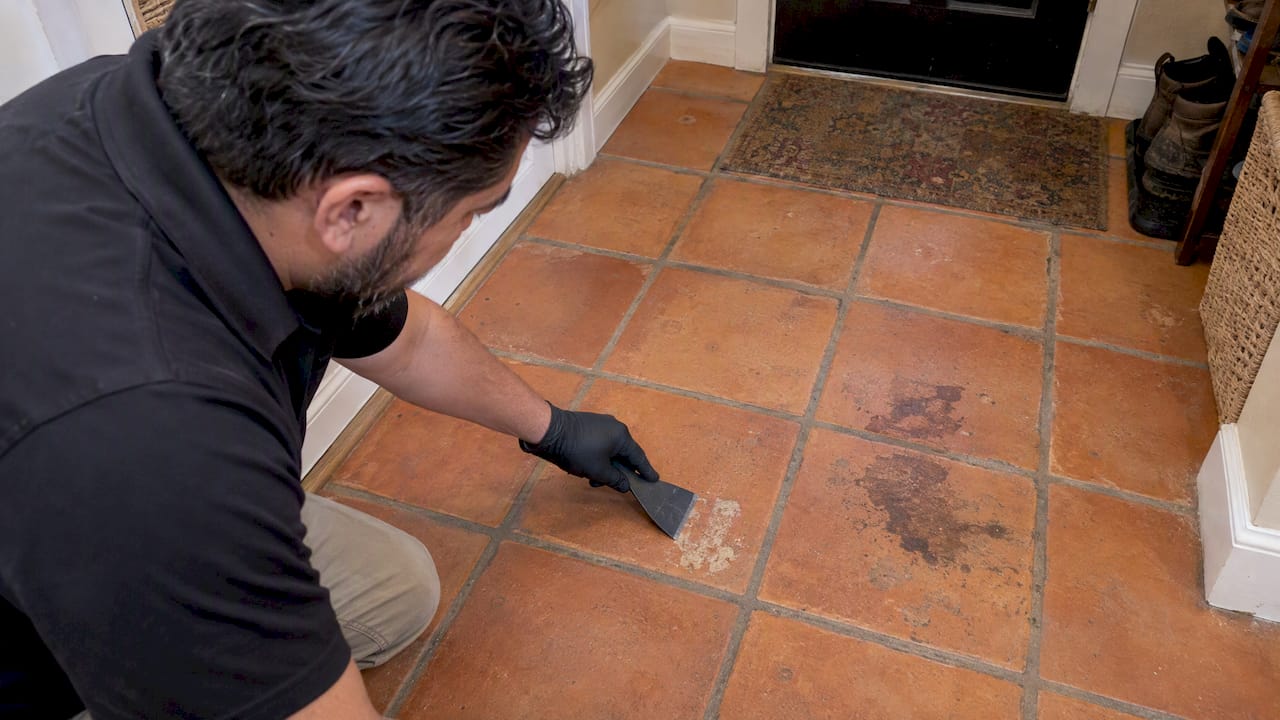
A failing sealer rarely fails quietly. Watch for uneven gloss, tacky spots underfoot, visible peeling, or patches that have yellowed or clouded compared to the rest of the floor. Any of these signs means it’s time to strip rather than recoat.
Before buying a stripper, figure out what you’re dealing with. A topical sealer sits on the surface and often shows a visible film at the edges of worn spots; a penetrating sealer won’t peel because there’s no film to peel. Matching the stripper to the sealer chemistry matters: an acrylic stripper on an oil-based finish, or vice versa, can leave residue that fights your new sealer later.
- Test the stripper in an inconspicuous corner first and watch how the tile reacts.
- Apply the stripper per label instructions, then agitate with a nonmetallic pad, never steel wool, which can leave fine scratches.
- Remove the softened residue, neutralize the surface according to the product label, and rinse until the water runs clear.
- Let the floor dry completely, often 24 hours or more, before applying anything new.
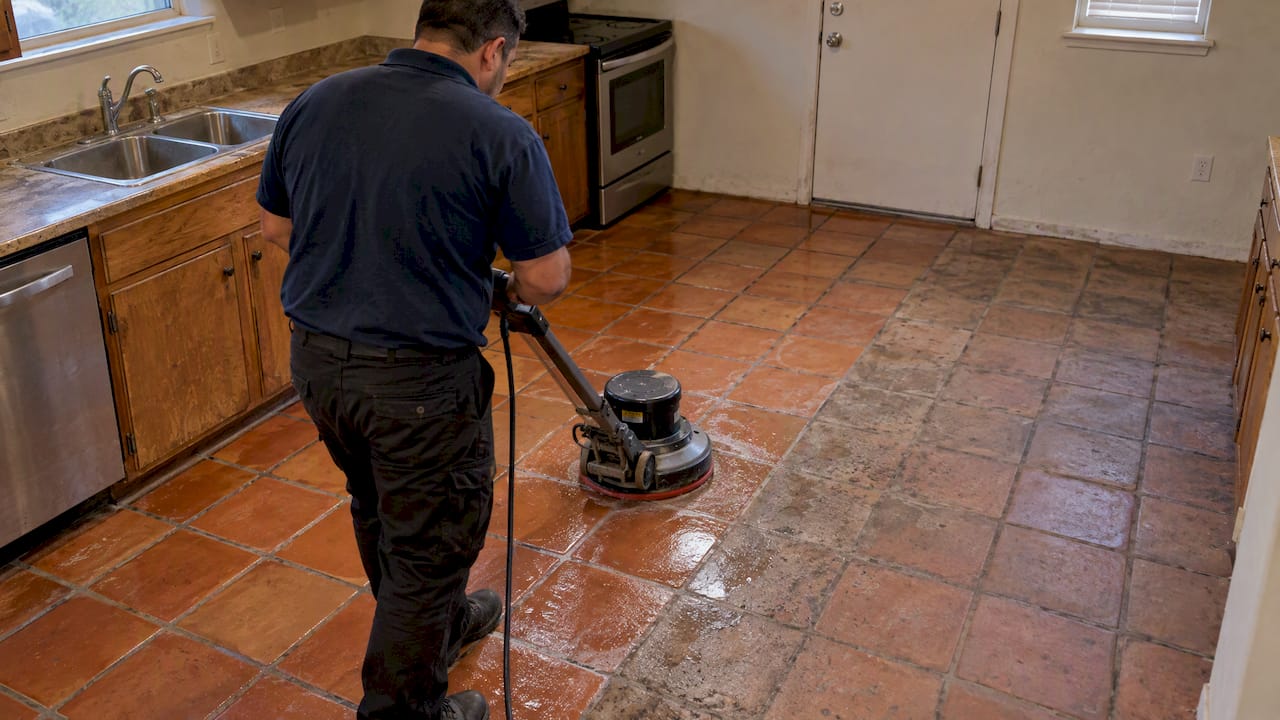
Thick or multiple old coats sometimes need light mechanical abrasion with a floor buffer. If the sealer history is unknown or the area is large, this is a point where many homeowners call in a tile and grout restoration service rather than risk damaging the clay.
Sealing workflow: materials, application, and final checks
Once the floor is clean, dry, and tested, the actual sealing goes quickly if you work in a logical order.
Materials and safety: a lint-free applicator pad or roller, a natural-bristle brush for edges and corners, the sealer itself, nonmetallic buckets, rags for any drips, and, for solvent-based products, a respirator rated for organic vapors. Open windows and run a fan; oil-based film systems carry strong fumes that build up fast in a closed room.
- Work in small sections. Tile-by-tile or in a few square feet at a time keeps you from losing track of where you’ve applied sealer.
- Apply thin, even coats. Puddling causes blotchy, uneven sheen once it dries, and it’s one of the most common DIY mistakes.
- Follow dwell and wipe instructions exactly. Some pre-grout and penetrating products need to sit for a set time, then have excess wiped off; manufacturer datasheets specify this step precisely, and skipping it leaves a sticky film.
- Build film systems in layers. Glossy oil-based finishes commonly need three to five thin coats, each allowed to dry before the next goes on.
- Respect the cure schedule. Datasheets typically call for a 24 to 72 hour cure window before light foot traffic, and longer before furniture or heavy use.
Pro Tip: Keep pets and foot traffic off the floor entirely during the first 24 hours; a single footprint pressed into a soft film coat is nearly impossible to buff out invisibly.
Once the sealer has fully cured, run the water test again in a few spots. Beads that sit on the surface without darkening the tile confirm the seal is holding. Check for visual uniformity across the room, and if you chose a gloss film finish, test the floor with wet feet before trusting it in a kitchen or bathroom where water is a daily fact of life.
Troubleshooting and maintenance: stains, efflorescence, and recoat timing
Even a well-sealed floor needs occasional attention. Grease and oil stains respond best to a dedicated degreaser applied promptly, since the longer they sit the deeper they work past the sealer line. Grout haze, if it appears after grouting, usually lifts with a cleaner formulated specifically for haze removal rather than a general all-purpose spray. Organic growth, such as mildew in damp bathrooms, calls back to the same cautious, low-contact-time bleach approach used in prep.
Efflorescence, the white, powdery deposits that sometimes surface on tile, signals moisture moving up through the slab. A sealer won’t fix that: it’s worth tracking down the moisture source, whether that’s slab humidity, a plumbing leak, or poor drainage outside, before resealing over it.
A water test that shows water soaking in rather than beading is a reliable field signal that it’s time to recoat, and it costs nothing but a few minutes and a cup of water.
- Sweep or dust-mop weekly to keep grit from grinding into the sealer.
- Do a deeper pH-neutral mop monthly, or more often in kitchens and entries.
- Avoid acidic cleaners like vinegar and abrasive scouring pads, both of which can dull or etch the finish over time.
- Recoat penetrating sealers as soon as the water test shows absorption; full strips are rarely needed unless the sealer has visibly failed.
When to hire a professional for Saltillo restoration
DIY sealing works well for small rooms and straightforward maintenance, but large areas, deep-set oil stains, or a floor with unknown sealer history are better handed to a professional tile and grout cleaning service. A typical professional process mirrors the DIY steps: deep clean, strip, neutralize, fully dry, then reseal, but with equipment that reaches grout lines and pores a mop can’t. Ask any quote to break down each stage so you know what you’re paying for.
Getting Saltillo sealing right the first time
Prep and testing matter more than the sealer brand on the can. For most family homes, a penetrating impregnator or a low-sheen film strikes the best balance of protection and manageable upkeep. When the floor’s history is murky or the damage is extensive, restoration by a professional beats guessing.
— Bernadette
Book professional tile cleaning and grout sealing in Albuquerque
We handle the parts of Saltillo restoration that are hardest to get right at home: deep cleaning, sealer stripping, and grout sealing done with a multi-step process and equipment built for grout lines and porous clay, not just mopping over the surface.

We give you transparent pricing before any work starts, so there are no surprises on the invoice. If your Saltillo floor needs a professional reset rather than another DIY pass, get a tile and grout cleaning estimate and we’ll scope the job to your floor’s actual condition.
FAQ
Do Saltillo tiles need to be sealed?
Yes. Saltillo is highly porous clay that absorbs water, oil, and grout if left bare, leading to permanent stains. Sealing, whether penetrating or film-forming, closes that porosity and makes routine cleaning possible.
What is the best sealant for Saltillo tile flooring?
There’s no single best option: it depends on the look and maintenance level you want. Penetrating sealers preserve a natural matte finish with low upkeep, while film-forming sealers deliver a glossy, classic look but need more frequent attention and eventual stripping.
What is the best sealer for terracotta tiles?
Terracotta and Saltillo share the same porous clay body, so the same two categories apply: penetrating impregnators for a natural appearance, or topical film sealers for sheen. The right choice comes down to whether the tile is indoors or exposed to weather, since film systems generally perform better indoors.
What is the best stain for Saltillo tile?
Saltillo’s warm, earthy color is typically left natural rather than stained, since most sealing products are chosen to enhance or preserve that existing tone rather than change it. If you want a different color, that’s a separate step from sealing and worth discussing with a flooring specialist before applying any sealer.
Sources
- Saltillo tile problems, solutions, expert fixes & prevention (PISOS Tile)
- How to seal unsealed Saltillo tile (Clay Imports)
Key sources for Saltillo tile sealing
These manufacturer datasheets and restoration guides informed the technical steps in this article, including cure times, sealer chemistry, and application methods.