(505) 280-5216
How to Inspect Cleaned Units: A Property Manager’s Guide
TL;DR:
- A post-clean inspection verifies that rental units meet cleanliness, functionality, and safety standards before occupancy. Using a standardized checklist, sensory checks, and timestamped photos ensures inspections are thorough, consistent, and defensible. Failure to meet minimum scores or critical item standards results in re-cleaning or total inspection failure.
A post-clean unit inspection is the systematic process of verifying that a residential or rental unit meets cleanliness, functionality, and guest-readiness standards before occupancy. Knowing how to inspect cleaned units correctly separates a property that earns five-star reviews from one that generates complaints on the first night. The 2026 quality assurance standard requires a minimum 90% passing score, and a single fail on any critical item triggers total rejection regardless of the overall score. Photo documentation, sensory checks, and a room-by-room checklist are the three pillars of a defensible, repeatable inspection process.
How to inspect cleaned units: tools and preparation
The right preparation determines whether your inspection catches real problems or just confirms what you hope to see. Arriving without a standardized checklist, adequate lighting, or a camera means you are relying on memory and habit. Both are unreliable.
Essential tools for a thorough inspection
| Tool | Purpose |
|---|---|
| Standardized inspection checklist | Tracks every room and item systematically; prevents skipped areas |
| Camera or smartphone | Captures at least 8 wide-angle photos per inspection for evidence |
| Portable flashlight | Illuminates dark corners, under-sink cabinets, and HVAC registers |
| Gloves | Allows tactile checks of surfaces without contamination risk |
| Digital checklist app | Timestamps entries and syncs photos for a complete audit trail |
Before entering the unit, confirm that power is on so you can test lighting, outlets, and HVAC. Schedule the inspection during daylight hours when natural light reveals dust, streaks, and residue that artificial lighting hides. Review the rental cleaning checklist specific to your property type before you walk in, not after.
- Confirm unit access and key handoff are arranged in advance
- Verify the cleaning team has completed and signed off on their own checklist
- Bring a printed or digital copy of your scoring rubric
- Check that your camera battery is fully charged before arrival
Pro Tip: Walk the unit once without marking anything. This first pass lets your eyes adjust and flags obvious issues before you begin the formal, item-by-item evaluation.
What does a room-by-room inspection process look like?
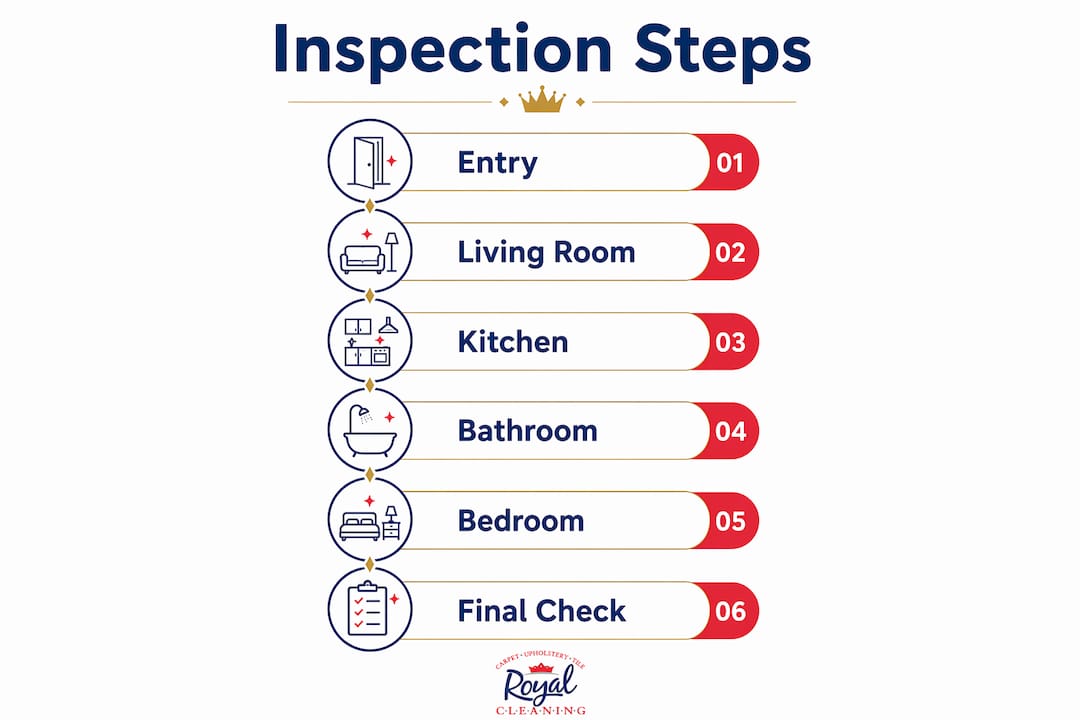
A structured, room-by-room sequence is the most reliable method for evaluating cleaned units. Starting at the entry and moving logically through each space reduces the chance of skipping areas and keeps your scoring consistent across multiple units.
Entry and living areas
Begin at the front door. Check the door handle, lock mechanism, and threshold for dirt or debris. Move into the living area and assess floors, baseboards, and furniture surfaces. Run your hand along shelves and window sills. Dust accumulates in these spots even after a thorough clean, and guests notice immediately.
Test every light switch and outlet cover. High-touch points like switches, remotes, and door handles require physical testing, not just a visual glance. A switch plate that looks clean but feels sticky will register as a fail during a proper inspection.
Kitchen
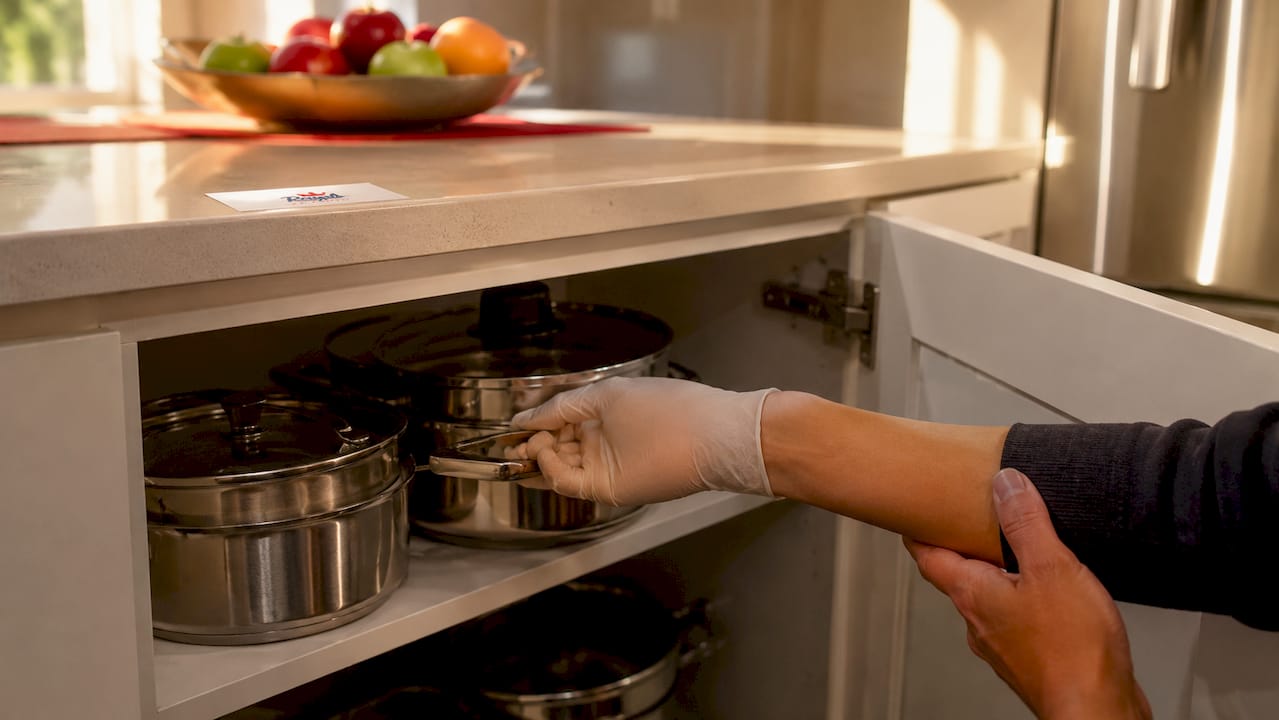
The kitchen carries the highest contamination risk of any room. Open every cabinet and drawer. Check for crumbs, grease residue, and odors inside. Pull the microwave door open and inspect the interior ceiling and turntable. Check behind the stove if it is freestanding, since grease and debris collect there and cleaners frequently miss it.
Run water at the sink and check the drain for odors. Inspect the refrigerator interior, including the door seals and vegetable drawers. A risk-based approach that targets high-contamination zones like appliance interiors and HVAC registers produces more reliable results than a surface-only sweep. This is especially true in kitchens where hidden grease can affect air quality throughout the unit.
Bathrooms
Bathrooms are a critical inspection category. A single fail here, such as visible mold, unsanitary fixtures, or soiled linens, results in automatic total inspection failure regardless of how well the rest of the unit scored. Inspect the toilet bowl, tank lid, and base. Check grout lines in the shower and around the tub. Smell the drain.
Verify that fresh linens are properly folded and placed. Check towel bars, soap dispensers, and the mirror for streaks. Open the vanity cabinet and inspect the interior. Guests open every cabinet, so inspectors must too.
Bedrooms and final systems check
In each bedroom, pull back the bedding and check the mattress surface and protector. Inspect pillowcases and duvet covers for stains. Open closet doors and check shelves and the floor. Dust collects on closet shelves even when the rest of the room is clean.
Finish with a systems check. Confirm the HVAC is functioning and that registers are free of dust buildup. Test smoke detectors. Check that all windows open and close properly. This final pass replicates what a guest does within the first ten minutes of arrival.
- Entry: door hardware, threshold, entryway floor
- Living area: floors, furniture, switches, remotes, baseboards
- Kitchen: counters, appliances, cabinets, drawers, sink, drain
- Bathrooms: fixtures, grout, linens, mirror, vanity interior
- Bedrooms: bedding, mattress, closets, shelves
- Systems: HVAC registers, smoke detectors, windows, outlets
Pro Tip: Vary your starting room on each inspection visit. Starting in the bathroom one day and the kitchen the next prevents the habitual path that causes inspectors to unconsciously skip familiar areas.
How do you evaluate and document inspection results?
Scoring and documentation turn a walkthrough into a defensible quality record. Without both, you have no way to prove condition at handoff, identify repeat problem areas, or hold cleaning teams accountable.
Scoring and critical fail rules
The minimum passing score for a cleaned unit is 90%. Any unit scoring below that threshold requires a targeted re-clean before it can be approved for occupancy. This standard applies regardless of how minor the individual failures appear.
Critical items operate under a separate rule. Bathroom sanitation, linen quality, and kitchen hygiene each carry a critical designation. A fail on any one of these items overrides the overall score and results in total inspection failure. This rule exists because these areas directly affect guest health and safety, not just appearance.
Record a pass or fail for each item on your checklist. Calculate a room score and then an overall unit score. Flag every failed item with a note describing the specific deficiency so the cleaning team can address the exact problem.
Documentation methods compared
| Method | Strengths | Limitations |
|---|---|---|
| Paper checklist | Low cost, no technology required | No timestamps, easy to lose, hard to share |
| Digital checklist app | Timestamps, photo integration, cloud storage | Requires device and connectivity |
| Timestamped photos only | Visual evidence, easy to capture | No structured scoring, hard to organize |
| Digital checklist with photos | Full audit trail, legally defensible, shareable | Requires setup and consistent use |
Photo documentation with timestamped, wide-angle shots prevents disputes and provides clear evidence of the unit’s condition at the time of inspection. The industry standard calls for at least 8 photos per inspection, covering each major room and any flagged deficiencies. Standardizing your photo positions, such as always shooting from the doorway of each room, makes comparisons across inspections far easier.
Pro Tip: Take your photos before you touch anything. A photo taken after you have straightened a pillow or wiped a surface no longer reflects the condition the cleaning team left behind.
What are the most common inspection mistakes to avoid?
Even experienced inspectors miss things. The most common failures come from psychological patterns, not carelessness. Understanding these patterns helps you build a process that compensates for them.
Self-inspection bias is the most significant risk when cleaners inspect their own work. Cleaners follow habitual paths and mentally check off areas they believe they cleaned, even when those areas have issues. Two-person inspection teams or randomized walkthrough sequences directly counter this tendency.
Frequently missed locations include:
- Inside dresser drawers and nightstand compartments
- Behind and beneath freestanding appliances
- The tops of door frames and ceiling fan blades
- Inside the dishwasher filter and spray arms
- Under bathroom sink cabinets and behind toilet tanks
- HVAC registers and return air vents
Visual inspection alone cannot detect microscopic contamination. Pairing visual checks with sensory assessments, specifically smell and touch, significantly improves inspection accuracy. An odor near the drain or a tacky surface under the couch cushion tells you something a visual pass will never catch.
Unexpected odors during inspection signal one of three problems: incomplete cleaning, a plumbing issue, or a hidden moisture source. Odors near walls or under sinks may point to pipe or drainage problems that no amount of cleaning will resolve. Address the source before re-inspecting.
Pro Tip: Schedule periodic two-person audits even when you trust your regular inspector. A second set of eyes on the same unit consistently surfaces issues the primary inspector has stopped seeing.
Key Takeaways
A thorough unit inspection requires a standardized checklist, sensory verification, and timestamped photo documentation to meet the 2026 minimum 90% passing score and protect against disputes.
| Point | Details |
|---|---|
| Use the 90% scoring standard | Any unit scoring below 90% requires a targeted re-clean before approval. |
| Apply the critical fail rule | A single fail in bathrooms, linens, or kitchen hygiene overrides the total score. |
| Document with at least 8 photos | Timestamped, wide-angle photos from consistent positions create a defensible record. |
| Inspect beyond the visible surface | Sensory checks and testing high-touch points catch what visual passes miss. |
| Counter self-inspection bias | Use two-person teams or randomized sequences to prevent habitual blind spots. |
Why the guest experience lens changes everything about inspection
Most inspection guides focus on surfaces. I think that framing misses the point entirely.
When I walk a unit, I try to move through it the way a guest does on arrival night. I open the microwave because guests heat food within the first hour. I pull back the duvet because guests notice a stained mattress protector before they notice a dusty baseboard. I test the remote because a guest who cannot turn on the TV at 10:00 PM will leave a one-star review about cleanliness, even if the floors are spotless.
The guest-experience perspective reframes every inspection item as a usability question, not just a cleanliness question. That shift changes what you prioritize and what you catch.
I have also learned that speed is the enemy of thoroughness in high-volume property management. The pressure to turn a unit quickly leads inspectors to compress the process. The result is a pattern of recurring complaints about the same missed areas. A residential cleaning checklist built around guest interactions, not just cleaning tasks, takes slightly longer to complete. The reduction in guest complaints and re-cleaning costs more than justifies that time.
The risk-based approach matters most in kitchens and bathrooms. Spending extra time on HVAC registers, appliance interiors, and drain areas catches the contamination that drives health complaints. Those are the areas where a fast visual pass fails you every time.
— Bernadette
Professional cleaning that supports your inspection standards
Royal Carpet and Tile Cleaning provides residential cleaning services in Albuquerque and Rio Rancho built around the same quality benchmarks covered in this guide. Every service is designed to meet inspection-ready standards, from bathroom sanitation to kitchen hygiene to linen-fresh presentation.
When your unit needs to pass a rigorous post-clean evaluation, the quality of the initial clean determines how much time you spend re-inspecting. Royal Carpet and Tile Cleaning’s professional carpet cleaning service addresses one of the most commonly flagged inspection items: flooring condition. Carpets that pass the tactile and odor checks on inspection day start with a professional extraction clean, not a surface vacuum. Contact Royal Carpet and Tile Cleaning to schedule a service that is built to pass your checklist the first time.
FAQ
What is the minimum passing score for a cleaned unit inspection?
The 2026 quality assurance standard sets the minimum at 90%. Any unit scoring below that threshold requires a targeted re-clean before it can be approved for occupancy.
What triggers an automatic inspection failure?
A single fail on any critical item, specifically bathroom sanitation, linen quality, or kitchen hygiene, results in total inspection failure regardless of the overall score.
How many photos should I take during a unit inspection?
The industry standard calls for at least 8 wide-angle, timestamped photos per inspection. Standardizing photo positions across inspections makes condition comparisons reliable and legally defensible.
How do I prevent missing areas during a unit inspection?
Vary your walkthrough sequence between inspections and use a two-person team when possible. Self-inspection bias causes inspectors to mentally check off areas they believe are clean, even when deficiencies exist.
What does a unit inspection checklist for cleaned units include?
A complete checklist covers entry hardware, living area surfaces and switches, kitchen appliances and cabinets, bathroom fixtures and linens, bedroom bedding and closets, and a final systems check covering HVAC, smoke detectors, and windows.