(505) 280-5216
Dirty Grout Got You Down? Here’s How to Clean Tile Grouting Like a Pro
Cleaning Tile Grouting: 7 Powerful Ways to Eliminate Grimy Stains
Why Your Grout Looks Like a Science Experiment (And How to Fix It)
Cleaning tile grouting doesn’t have to feel like an impossible task. Here’s what actually works:
Quick Answer for Cleaning Tile Grouting:
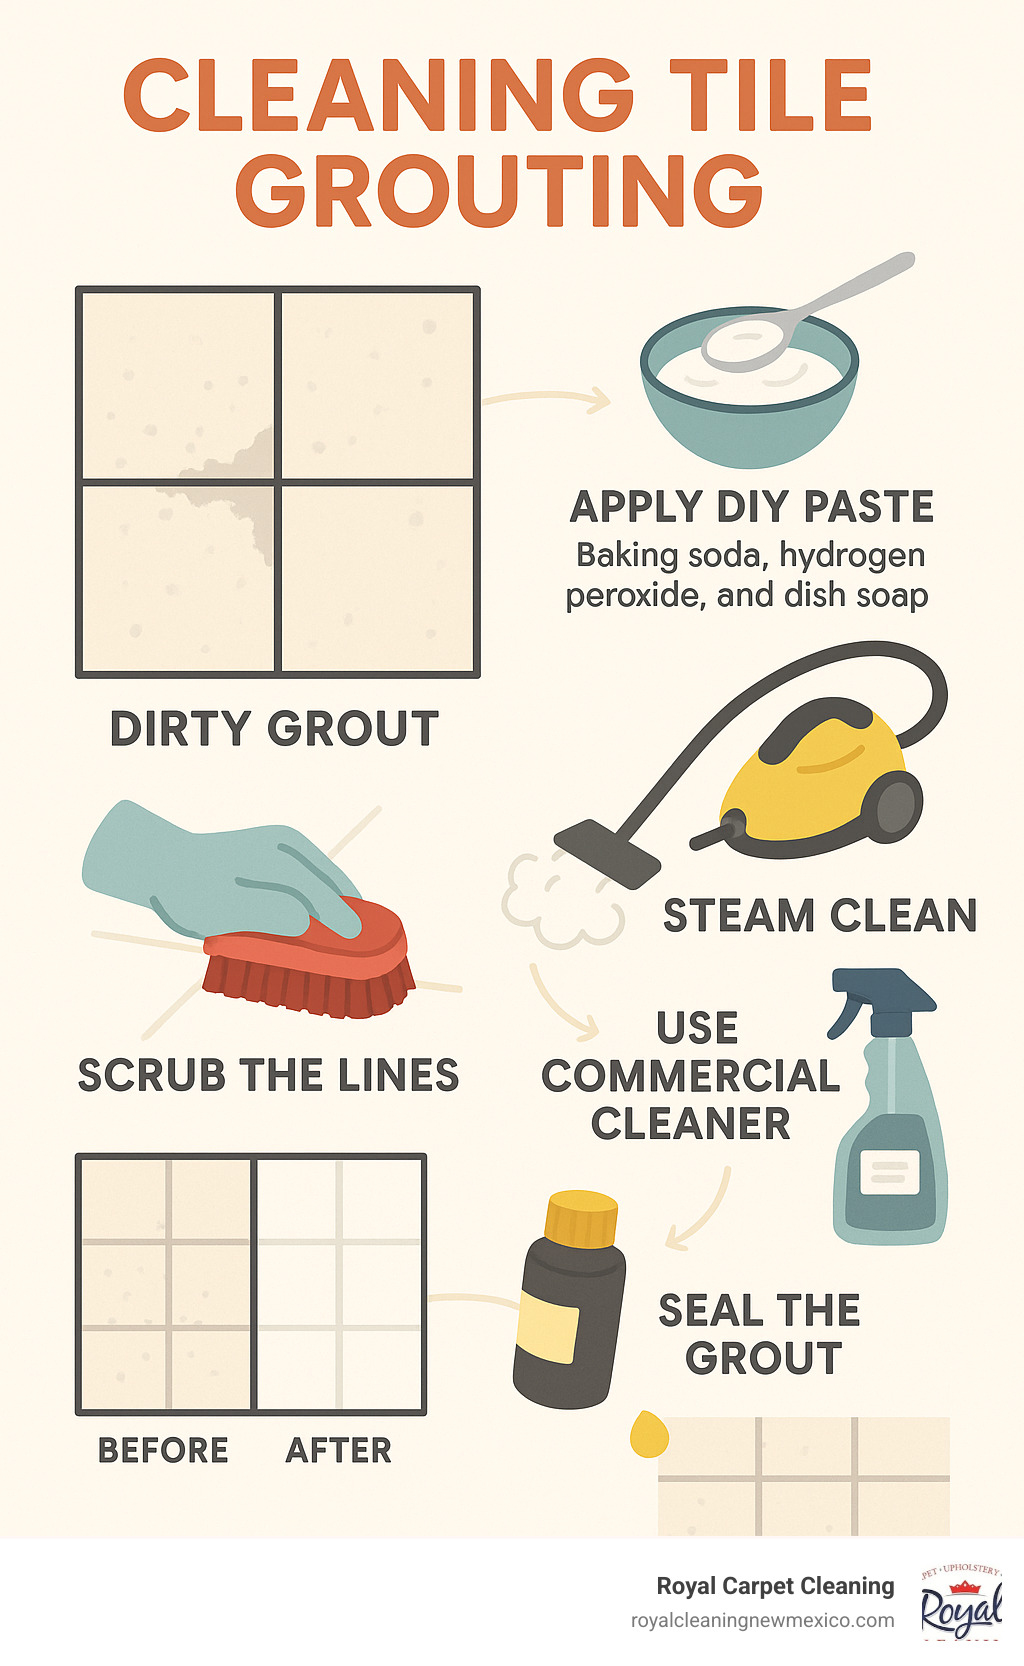
1. Mix baking soda + hydrogen peroxide + dish soap into a paste
2. Apply and let sit 10-15 minutes for the fizzing action to work
3. Scrub with a stiff brush in circular motions
4. Rinse thoroughly with clean water
5. Seal grout annually to prevent future stains
That grout between your tiles? It’s basically a dirt magnet. The porous cement material soaks up everything – soap scum, cooking grease, pet accidents, and moisture. Over time, this creates the perfect breeding ground for mold and bacteria.
The average home collects up to 40 pounds of dirt and allergens each year, and much of it ends up trapped in those grout lines. Professional cleaning can remove up to 96.5% of common household allergens from grout, but you can get great results at home with the right approach.
Whether you’re dealing with bathroom mildew or kitchen grease stains, the key is understanding that grout cleaning isn’t just about scrubbing harder – it’s about using the right products and techniques.
I’m Bernadette King, and I’ve spent years helping cleaning professionals tackle the toughest grout challenges across New Mexico. My experience with cleaning tile grouting has taught me that the right method makes all the difference between frustration and sparkling results.
Grout 101: Why It Gets So Gross
Ever wonder why your grout starts looking like a petri dish experiment gone wrong? It’s not personal – your grout is just doing what porous cement does naturally. Those depressed joints between your tiles create perfect little channels for collecting every bit of dirt, grime, and moisture that comes their way.
Picture grout as a tiny cement sponge sitting between your beautiful tiles. Every single day, this sponge soaks up a delightful mixture of whatever life throws at it. Soap scum and body oils from your morning shower seep right in. Grease splatter from cooking dinner finds its way into kitchen floor grout. Even something as innocent as foot traffic brings in outdoor debris that settles into those porous surfaces.
But here’s where it gets really interesting – water hardness plays a huge role in how gross your grout gets. Those white, chalky deposits you see? That’s mineral buildup from hard water, and it actually makes your grout even more porous. It’s like creating tiny landing pads for mildew spores and other unwanted guests.
The real kicker is when pH imbalance enters the picture. Many people unknowingly make their grout problems worse by using the wrong cleaners. Acidic products can actually etch and weaken grout, while overly alkaline cleaners leave behind residues that attract even more dirt. It’s like trying to solve a puzzle with pieces that don’t fit.
When you’re cleaning tile grouting, understanding why it gets dirty in the first place helps you choose the right approach to actually fix the problem.
Health & Home Impacts
Now let’s talk about why dirty grout isn’t just an eyesore – it’s actually affecting your family’s health and your home’s value in ways you might not expect.
Those dark, funky grout lines are hosting some pretty unwelcome parties. Dust mites absolutely love the organic matter that gets trapped in grout pores, and their waste products can trigger asthma and allergies faster than you’d think. We’ve worked with families here in Albuquerque who couldn’t figure out why their respiratory irritants were getting worse until we deep-cleaned their tile and grout.
Slip hazards are another sneaky problem. That innocent-looking film building up on your shower grout? It’s creating a slippery surface that can send you sliding when you least expect it. Nobody wants to explain to the emergency room doctor that they wiped out because of dirty grout.
Then there’s the interior aesthetics factor. Real estate professionals tell us that grimy grout can make even the most expensive tile look cheap and neglected. It’s one of those details that hits you right in the face when you walk into a room – and potential buyers notice it immediately.
The good news is that every single one of these problems disappears when you tackle cleaning tile grouting the right way. Your grout doesn’t have to stay gross forever.
Gear Up: Best Tools & Cleaners for Grout Success
Picture this: you’re ready to tackle that grimy grout, armed with nothing but an old sponge and whatever spray cleaner you found under the sink. Three hours later, you’re exhausted, your grout looks the same, and you’re ready to tile over everything. Sound familiar?
The truth is, cleaning tile grouting successfully isn’t about working harder – it’s about having the right gear for the job. After years of testing everything from dollar store finds to professional-grade equipment, I’ve learned that the right tools make the difference between a frustrating afternoon and actually getting results.
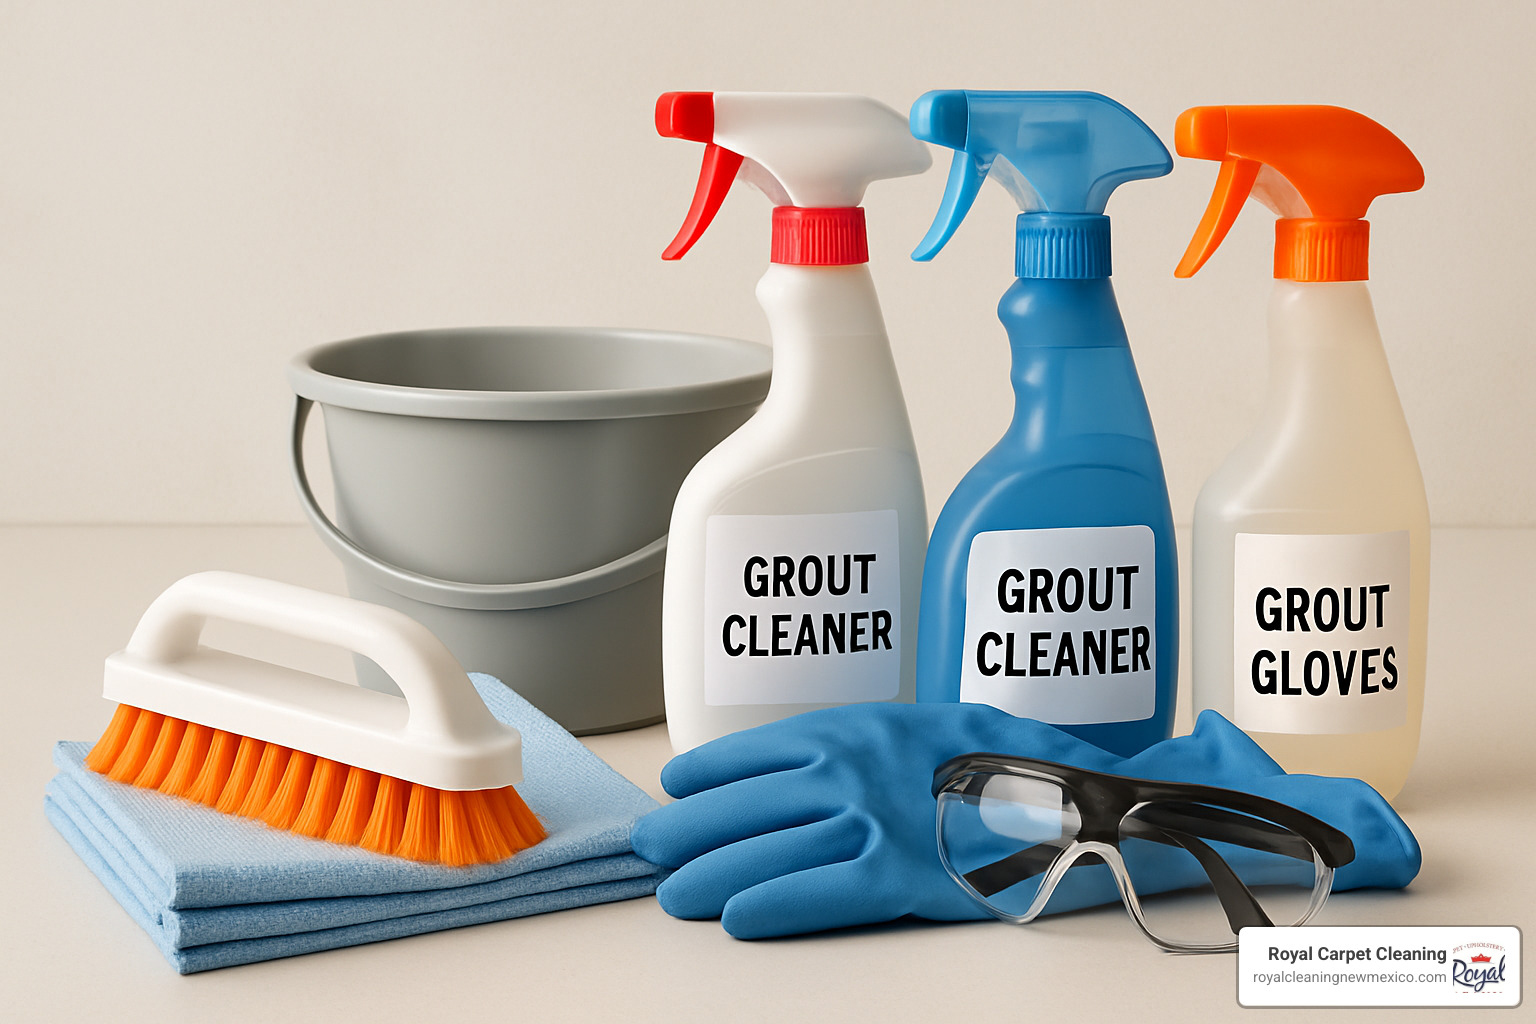
Your grout cleaning arsenal needs to start with a quality grout brush – and I’m talking about one with nylon bristles, not wire. Wire brushes might seem tougher, but they’ll actually scratch and damage your grout, creating more places for dirt to hide. An OXO brush with ergonomic handles will save your wrists during longer cleaning sessions, trust me on this one.
Microfiber cloths are your best friend for the cleanup phase. They grab onto grime without just pushing it around like paper towels do. Pair these with good rubber gloves and you’re protecting your hands from both chemicals and the rough scrubbing action.
For cleaning solutions, you don’t need to break the bank. Baking soda creates a gentle abrasive paste that won’t damage grout, while hydrogen peroxide provides that satisfying fizzing action that actually lifts stains. Oxygen bleach works wonders on tough stains without the harsh fumes of chlorine bleach.
Here’s a secret from the cleaning world: LA’s Totally Awesome cleaner often outperforms products costing ten times more. At around $1.25, it’s become a favorite among professionals. The Pink Stuff is another standout that works on both ceramic and natural stone surfaces.
If you’re dealing with large areas, a steam cleaner can be a game-changer. The pressurized steam cuts through grime without chemicals, though you’ll want protective goggles and should always use distilled water to prevent mineral buildup in your machine.
For more specialized tools and professional techniques, check out our comprehensive guide to grout cleaning tools.
One critical warning: never use acidic cleaners like vinegar on natural stone grout. They can cause permanent etching that’s impossible to reverse. For detailed information on what vinegar can damage, see this scientific research on vinegar safety.
Choosing the Right Brush
Not all grout brushes are created equal, and picking the wrong one can turn your cleaning project into a marathon of frustration. The key is matching your brush to your grout lines – too wide and it won’t fit properly, too narrow and you’ll be scrubbing until next Tuesday.
For standard grout lines (about 1/8″ to 1/4″ wide), a brush around 1/2″ wide hits the sweet spot. It fits snugly in the line while covering enough area to make progress. Wide grout lines of 1/4″ and up can handle a 3/4″ brush, which speeds up the process considerably.
Ergonomic handles aren’t just marketing fluff – they genuinely matter when you’re scrubbing multiple rooms. Look for brushes with comfortable grips that won’t slip when wet. Your hands and wrists will thank you after a long cleaning session.
Electric scrubbers can be absolute lifesavers for large areas. A drill with a brush attachment cuts cleaning time dramatically, though you need to be careful with pressure to avoid damaging the grout. Start gentle and increase pressure only if needed.
Cleaner Match-Up
Choosing between DIY solutions, commercial sprays, and steam cleaning depends on your specific situation. DIY paste made from baking soda and hydrogen peroxide costs under $5 and works on all tile types, but requires 10-15 minutes of dwell time and medium effort scrubbing.
Commercial sprays range from $10-20 and vary wildly in effectiveness. They typically need 5-10 minutes to work and require less scrubbing, but you need to check compatibility with your specific tile type – some can damage natural stone.
Steam cleaning requires the biggest upfront investment at $100+ for equipment, but it works immediately without chemicals and is safe on all surfaces. It’s fantastic for routine maintenance but might need extra help for set-in stains.
The dwell time – how long you let the cleaner sit before scrubbing – is crucial regardless of which method you choose. Rushing this step is like trying to remove a bandage before the adhesive loosens. Give your chosen cleaner time to break down the grime, and your scrubbing will be much more effective.
Cleaning Tile Grouting: Step-by-Step Methods
Ready to transform those grimy grout lines? The secret to successful cleaning tile grouting isn’t about scrubbing harder – it’s about working smarter with a proven workflow that lets your cleaning solutions do the heavy lifting.
Before you dive in, take a few minutes to prep properly. Clear the area of rugs, toiletries, and anything that might splash or get in your way. A quick sweep or vacuum removes loose dirt that would otherwise turn into mud when mixed with your cleaning solution.
Ventilation matters more than you think. Even natural cleaners can create strong fumes in enclosed spaces, so crack those windows or flip on the exhaust fan. Trust me, your lungs will appreciate the fresh air.
Always put on rubber gloves before starting – even baking soda can dry out your skin during longer cleaning sessions. And here’s a pro tip from our years of experience: test your cleaner on a hidden spot first. That fancy new cleaner might react differently with your specific grout type.
The magic workflow is simple: apply your cleaner, let it work (this is the step most people skip!), scrub with purpose, rinse thoroughly, then repeat if needed. Dwell time is your secret weapon – rushing this process is why so many people think grout cleaning doesn’t work.
DIY Cleaning Tile Grouting Recipe
This formula has saved countless homeowners from expensive professional cleanings. After testing dozens of combinations, this DIY paste consistently delivers results that rival commercial products:
Mix 3/4 cup baking soda with 1/4 cup hydrogen peroxide and 1 tablespoon dish soap. The consistency should look like thick peanut butter – spreadable but not runny. If it’s too thick, add hydrogen peroxide drop by drop until it’s just right.
Apply the paste generously to your grout lines using an old toothbrush. Don’t be stingy here – you want good coverage. Then comes the hardest part: wait 10-15 minutes. I know it’s tempting to start scrubbing immediately, but this waiting period is when the magic happens.
Watch for the bubbling action – that’s the hydrogen peroxide lifting stains from deep in the grout pores. The baking soda provides gentle scrubbing power while the dish soap cuts through soap scum and grease buildup.
After your patience pays off, scrub in circular motions with your grout brush. You’ll be amazed at how easily the grime comes up. Rinse thoroughly with clean water and wipe dry with microfiber cloths for that professional finish.
For advanced techniques on achieving pristine white grout, check out our detailed guide on how to make grout white.
Steam Cleaning Tile Grouting Safely
Steam cleaning earns top marks for routine maintenance and sanitization. The pressurized steam kills bacteria and mold without harsh chemicals – perfect for families with kids, pets, or chemical sensitivities.
Fill your steam cleaner reservoir with distilled water to prevent mineral buildup in the machine. Regular tap water can clog the system over time, especially here in Albuquerque where our water runs hard.
Safety first: wear protective goggles because steam burns are no joke. Heat your unit according to the manufacturer’s instructions, then steam each grout line for 10-15 seconds. The key is moving steadily – don’t linger in one spot or you might damage the grout.
Immediately wipe each steamed section with a microfiber cloth while it’s still warm. This removes the loosened dirt and prevents it from settling back into the grout pores.
Here’s something important: steam cleaning removes existing grout sealant, so you’ll need to reseal afterward. For detailed information on steam cleaner effectiveness, this external research on steam cleaning equipment provides helpful insights.
Using LA’s Totally Awesome & Other Commercial Options
LA’s Totally Awesome has earned legendary status among cleaning professionals, and at $1.25 per bottle, it outperforms cleaners costing ten times more. The secret is in how you use it.
Spray it full strength directly on grout lines – ignore the 5:1 dilution recommendation when dealing with tough stains. Wait 5 minutes for the cleaner to penetrate those porous grout surfaces, then scrub with a stiff brush focusing on the most stained areas.
Wipe with microfiber cloths to remove the loosened dirt, then rinse thoroughly with water. This final rinse is crucial because any cleaner residue left behind will attract new dirt faster.
Ventilation is essential with this product – it has a strong fragrance that can overwhelm smaller spaces. We’ve learned this the hard way in windowless bathrooms!
The Pink Stuff offers another excellent option at around $5. It works on both ceramic and marble tiles, earning perfect marks for versatility. Grout-EEZ provides professional-strength cleaning for around $20, though it’s only safe for ceramic and porcelain tiles.
Oxygen bleach solutions deserve special mention for colored grout. Unlike chlorine bleach, they won’t fade your grout’s original color while still providing powerful stain removal.
Tackling Set-In or Colored Grout Stains
Some stains need extra persuasion. When your regular cleaning routine isn’t cutting it, these targeted approaches work wonders.
For stubborn stains, mix 2 tablespoons of oxygen bleach powder in 2 cups of warm water. Apply this solution and let it sit for up to 15 minutes – longer dwell times help with deeper penetration. Scrub with extra pressure using your stiffest brush, then rinse and assess your progress.
The poultice method handles the really challenging cases. Create a thick paste with oxygen bleach powder and just enough water to form a spreadable consistency. Apply this paste about 1/4 inch thick over the stained area, then cover with plastic wrap and tape down the edges to prevent drying.
Let this sit overnight for maximum penetration into those stubborn stains. The next day, remove the plastic and scrub the area clean. This method works because it keeps the cleaning solution active and moist for extended periods.
Grout pens deserve an honest mention here – they don’t actually clean anything. Think of them as makeup for grout. They cover stains with pigmented coating, which can create a uniform appearance but isn’t a real cleaning solution. Use them for touch-ups after proper cleaning, not as a substitute for it.
Seal & Maintain Like a Pro
Here’s the truth about cleaning tile grouting – if you skip the sealing step, you’re basically signing yourself up to repeat this whole process in a few months. It’s like spending hours detailing your car and then parking it under a tree full of birds.
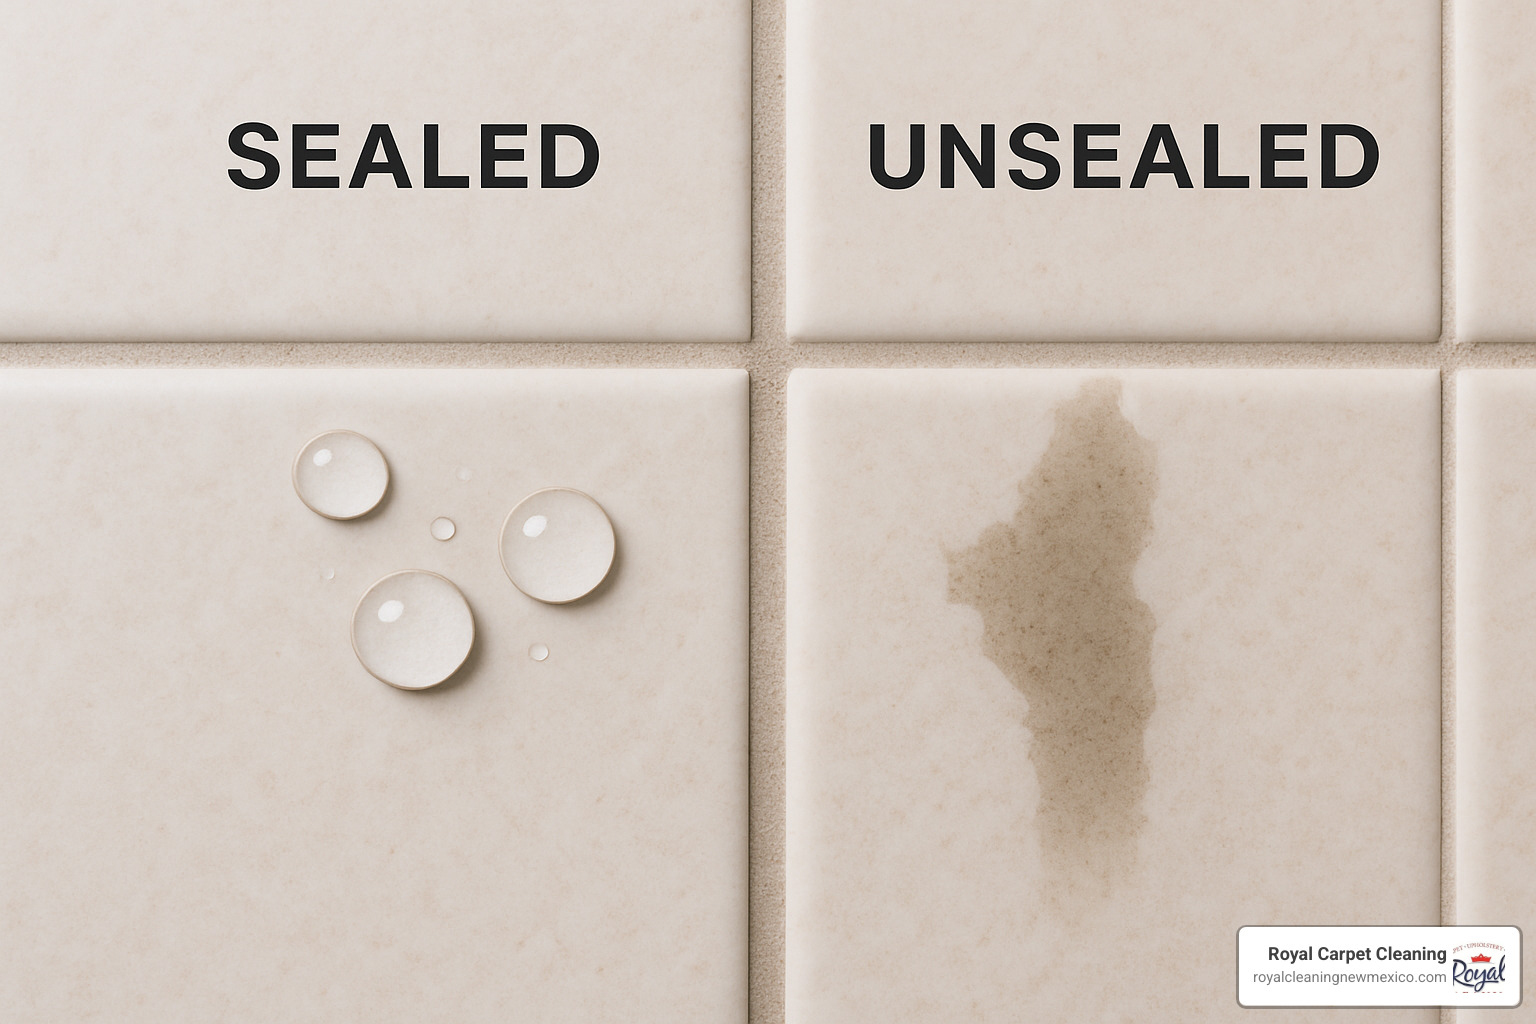
Grout sealer creates an invisible shield that repels water, oil, and stains. Without it, your freshly cleaned grout is just waiting to soak up the next spill, splash, or muddy footprint. The good news? Sealing is actually the easiest part of the whole process.
Wait for complete drying before sealing – we’re talking 24 to 48 hours after your final rinse. Trapped moisture under sealant can cause bigger problems than dirty grout ever did. Apply your wear-resistant sealer with a small brush or squeeze bottle, being careful to wipe any excess off the tile surface immediately. Nobody wants permanently cloudy tiles.
The drying time varies by product, but most sealers need 24 hours to fully cure. Test it by dropping a few water beads on the grout – they should sit on top like little pearls instead of soaking in.
Your re-sealing schedule depends on foot traffic and use. Busy bathroom floors might need attention every 6 months, while that guest bathroom grout could go 2 years between treatments. High-traffic kitchen areas fall somewhere in between at about once a year.
Daily maintenance makes all the difference between manageable touch-ups and full-scale grout wars. Rubbing alcohol wipe-downs once a week kill mold spores before they can establish their evil empire in your grout lines. Shower squeegees aren’t just for neat freaks – they remove the moisture that feeds mildew growth. Door mats inside and outside entrances catch amazing amounts of dirt before it gets tracked across your beautiful tile.
The secret weapon? Clean spills immediately. That dropped spaghetti sauce or spilled coffee can’t stain what it can’t penetrate, but only if you act fast.
For professional sealing services that come with guarantees, check out our grout sealing options.
Common Mistakes to Avoid
We’ve watched homeowners accidentally destroy their grout with the best intentions. These mistakes are completely avoidable once you know what to watch for.
Chlorine bleach misuse tops our list of grout disasters. That innocent bottle under your sink can strip color from tinted grout and actually weaken the grout structure over time. It’s like using sandpaper to clean your car paint. Oxygen bleach gives you the whitening power without the damage.
Acidic cleaners on stone create permanent etching that looks like water spots but never comes off. Vinegar might be great for windows, but it’s grout’s worst enemy when you have natural stone tiles. For detailed information on what vinegar can damage, see this scientific research on vinegar safety.
Wire brushes seem logical for tough stains, but they scratch tiles and gouge grout like tiny chainsaws. Nylon bristles provide all the scrubbing power you need without turning your beautiful tile into a scratched mess.
Over-scrubbing is the amateur’s mistake. More elbow grease doesn’t equal better results – it just equals sore arms and potentially damaged grout. Let your cleaning solution do the heavy lifting, then use steady, moderate pressure.
Skipping rinse might save time upfront, but it guarantees more work later. Cleaning residue left on grout actually attracts dirt like a magnet. Always finish with thorough rinsing and complete drying.
What If the Grout Crumbles?
Sometimes you find that your grout isn’t just dirty – it’s actually falling apart. There’s a big difference between stained grout and structurally damaged grout, and the solutions are completely different.
Re-grouting basics become necessary when scrubbing makes grout crumble, when you see large cracks or missing sections, or when grout pulls away from tiles like old caulk. These are signs that cleaning won’t help because there’s nothing solid left to clean.
Patch repairs work for small problem areas. Clean out all the loose material, apply premixed grout from a tube, smooth it with a damp sponge, and seal once it’s cured. It’s like filling a pothole – not glamorous, but effective for isolated damage.
Professional help cues include large areas needing re-grouting, multiple rooms with grout failure, signs of structural tile movement, or persistent moisture problems that keep causing new damage. These situations often have underlying causes that DIY patches won’t address.
At Royal Carpet Cleaning, we handle complete grout restoration throughout Albuquerque and surrounding areas. Our multi-step process addresses both the immediate grout problems and the underlying moisture or structural issues that caused them in the first place.
Conclusion & Next Steps
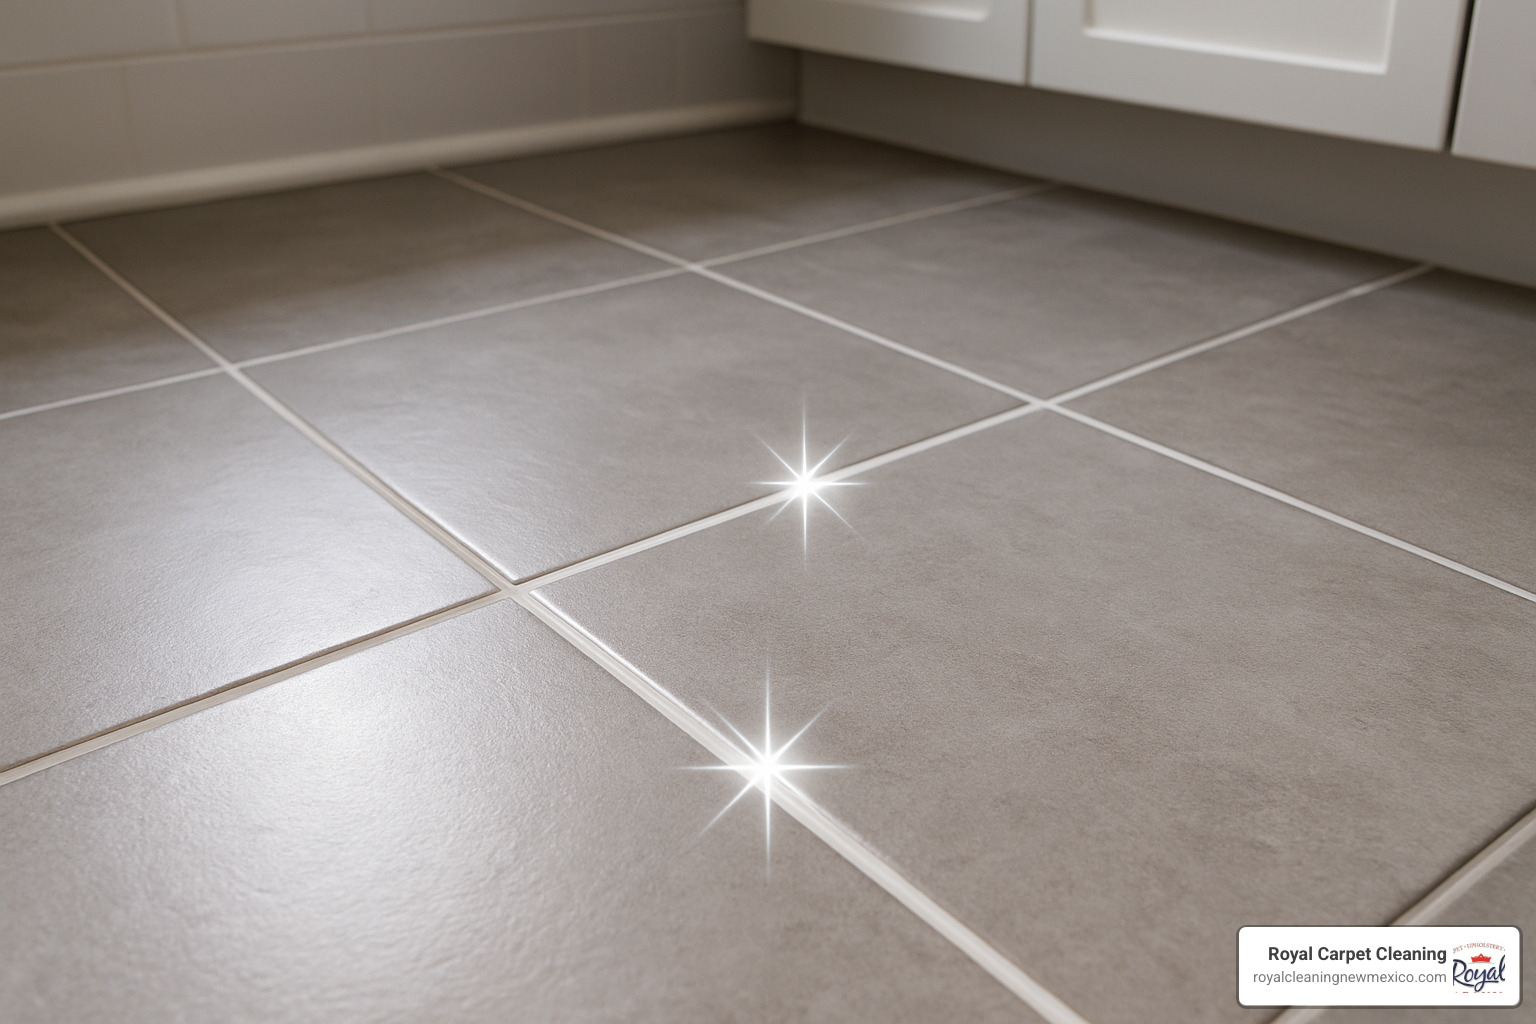
You’ve just learned everything you need to transform those grimy grout lines from embarrassing to sparkling. Cleaning tile grouting really can be straightforward when you know what works and what doesn’t.
The truth is, most people have been making this job harder than it needs to be. They skip the dwell time, use the wrong tools, or forget to seal afterward. But now you know better. You’ve got the DIY paste recipe that works on 90% of grout problems, you understand why proper brushes matter, and you know that sealing is what keeps your hard work looking good.
Here’s what I want you to do next: start small. Pick one bathroom or one section of kitchen backsplash. Mix up that baking soda, hydrogen peroxide, and dish soap paste we talked about. Apply it, wait those crucial 10-15 minutes, scrub with your nylon brush, and rinse thoroughly. You’ll be amazed at the difference.
Don’t forget the maintenance piece – those weekly alcohol wipe-downs and immediate spill cleanup will save you hours of deep cleaning later. Think of it like brushing your teeth – a little effort regularly beats major work later.
Sometimes though, the grout situation is beyond what any homeowner should tackle. Maybe it’s been neglected for years, maybe there are structural issues, or maybe you just don’t have the time. That’s where Royal Carpet Cleaning’s one-stop solution comes in handy.
Our multi-step professional process removes up to 96.5% of household allergens from your grout using equipment that goes way beyond what’s available at the hardware store. We serve families throughout Albuquerque, Rio Rancho, Corrales, Placitas, and Bernalillo with transparent pricing and our 100% satisfaction guarantee. No surprises, no pressure – just results.
The health benefits alone make this worthwhile. When we can reduce allergens by over 96%, families with asthma and allergies notice the difference immediately. It’s not just about having prettier floors – it’s about breathing easier in your own home.
Whether you tackle this project yourself or bring in the professionals, the important thing is taking action. Your maintenance calendar should include weekly touch-ups, monthly deeper cleaning, quarterly sealant inspection, and annual professional service or thorough DIY overhaul.
Ready to get started? Try our proven methods first, and remember that help is just a phone call away when you need it. For comprehensive professional service, check out our tile and grout cleaning page to see how we can help.
Your grout doesn’t have to be a source of stress anymore. With these techniques and a little consistency, you’ll have tile that looks fresh and a home that’s healthier for everyone who lives there.